
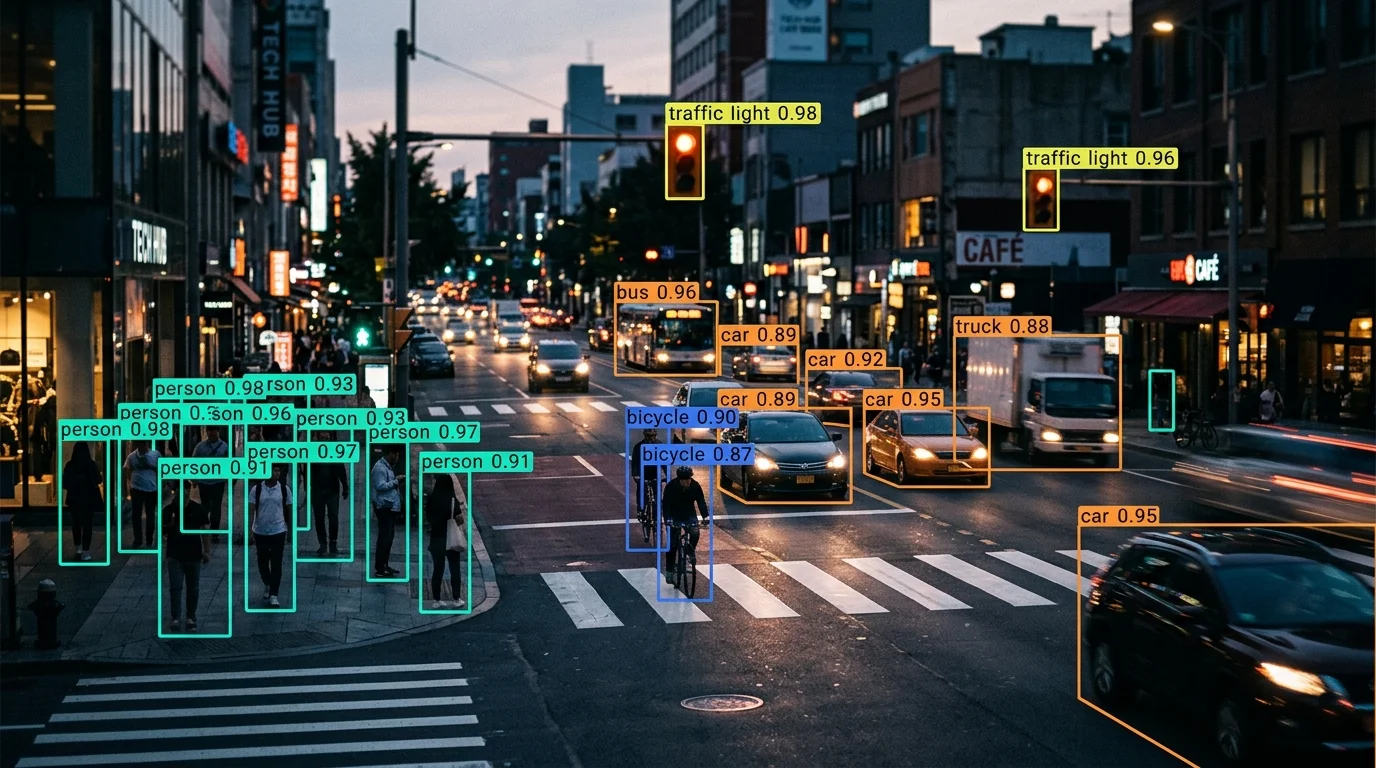
先參考 TensorFlow Object Detection API 功能介紹與模型選擇 選定想要使用的模型,下載後解壓縮到專案的資料夾內,再設定好執行環境。
這個範例需要一個攝影機,使用的是 SSD MobileNet V2 FPNLite 640x640 的預訓練模型。
即時攝影機物件偵測的程式碼長什麼樣子?
```python
import numpy as np
import tensorflow as tf
import VideoStream
import cv2
from object_detection.utils import label_map_util
PATH_TO_SAVED_MODEL = "./ssd_mobilenet/saved_model"
detect_fn = tf.saved_model.load(PATH_TO_SAVED_MODEL)
PATH_TO_LABELS = './models/research/object_detection/data/mscoco_label_map.pbtxt'
category_index = label_map_util.create_category_index_from_labelmap(PATH_TO_LABELS, use_display_name=True)
import time
videostream = VideoStream.VideoStream((1920, 1080), 30, 0).start()
cam_quit = 0
while cam_quit == 0:
imageSource = videostream.read()
smallImg = cv2.resize(imageSource, (1920//5, 1080//5))
input_tensor = np.expand_dims(smallImg, 0)
start_time = time.time()
detections = detect_fn(input_tensor)
end_time = time.time()
num_detections = int(detections.pop('num_detections'))
elapsed_time = end_time - start_time
print('Done! Took {} seconds'.format(elapsed_time))
detections = {key: value[0, :num_detections].numpy()
for key, value in detections.items()}
for detection_boxes, detection_classes, detection_scores in \
zip(detections['detection_boxes'], detections['detection_classes'], detections['detection_scores']):
if detection_scores > 0.3:
y_min_pixel = int(detection_boxes[0] * 1080)
x_min_pixel = int(detection_boxes[1] * 1920)
y_max_pixel = int(detection_boxes[2] * 1080)
x_max_pixel = int(detection_boxes[3] * 1920)
cv2.rectangle(imageSource, (x_min_pixel, y_min_pixel), (x_max_pixel, y_max_pixel), (255, 0, 0), 2)
cv2.imshow('frame', imageSource)
key = cv2.waitKey(1) & 0xFF
if key == ord("q"):
cam_quit = 1
cv2.destroyAllWindows()
videostream.stop()
```
這段程式的核心流程是:讀取攝影機畫面 → 縮小尺寸加快推論 → 丟進模型取得偵測結果 → 篩選信心分數大於 0.3 的框 → 換算回原始解析度畫出矩形 → 顯示畫面,按 `q` 結束迴圈並釋放資源。
這樣跑起來速度和效果如何?
執行速度不錯,一秒可以有 25 FPS,適合用於即時串流。
執行畫面目前還沒有把偵測到的類別標籤畫上去;如果想要標記類別,可以直接用 `detections['detection_classes']` 作為分類的 index,從 `category_index` 去查對應的分類名稱,再用 `cv2.putText()` 把文字畫在矩形框旁邊。
常見問題
為什麼要先把畫面縮小再丟進模型?
範例裡用 `cv2.resize(imageSource, (1920//5, 1080//5))` 把畫面縮到原本的五分之一再做推論,是為了加快單張畫面的推論速度,讓即時串流不會卡頓。偵測框座標算出來後,再用原始寬高(1920、1080)換算回全解析度畫面上的實際位置。
信心分數的門檻要怎麼抓?
範例用的門檻是 `detection_scores > 0.3`,這個數字不是固定答案。門檻設太低容易出現誤判的框,設太高則可能漏掉一些偵測目標,實務上建議依實際場景多測試幾組門檻值再決定。
這個範例可以直接拿去做正式產品嗎?
這是一個示範核心流程的最小範例,缺少類別標籤顯示、多目標追蹤、錯誤處理與資源釋放的例外狀況(例如攝影機中斷)等。正式產品化前,這些都需要額外補強。
參考資料
最後更新
2026-08-27
延伸閱讀
關於作者 {#author}
Claire Chang | 企業 AI 導入與流程轉型顧問。專注於 AI Agent 架構設計、ERP 系統整合與企業 AI 治理。
首次發布:2023-07-28