
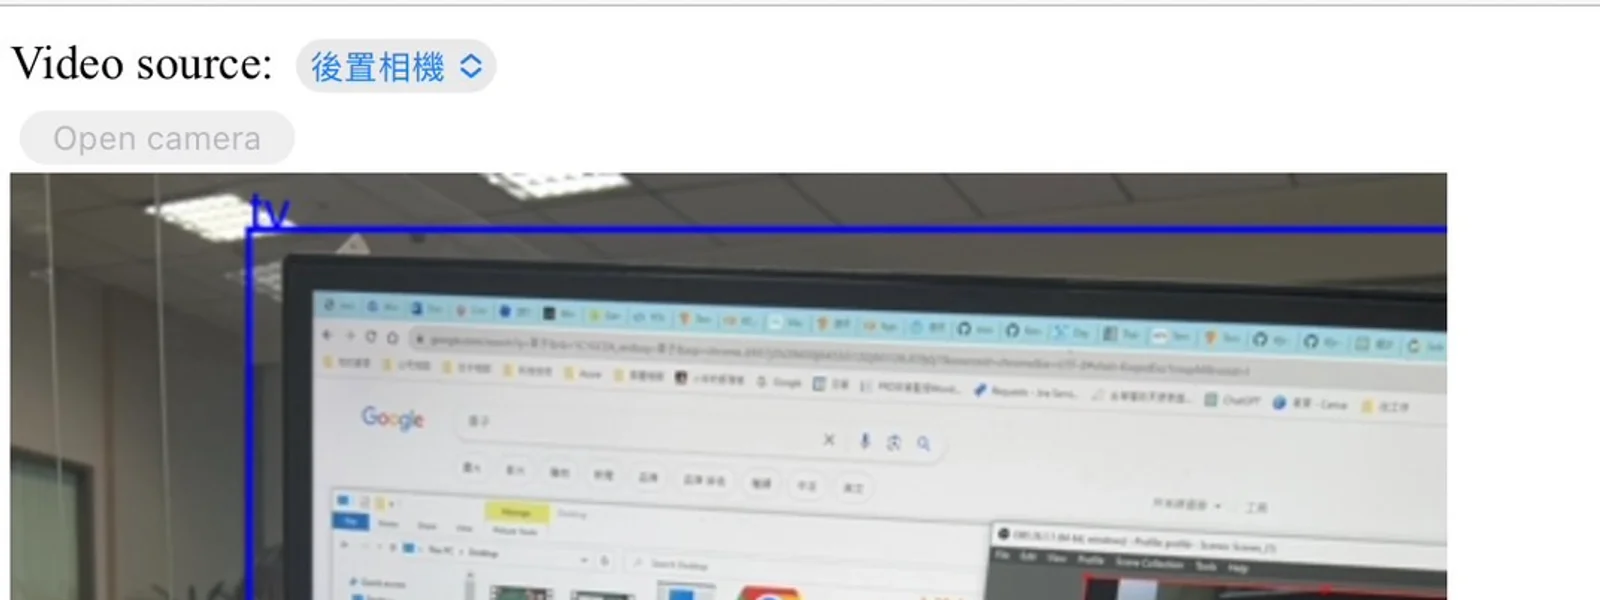
TensorFlow.js coco-ssd 可以直接在瀏覽器裡做物件偵測,不需要先架 Python 後端。載入 TensorFlow.js 與 @tensorflow-models/coco-ssd 後,模型可以接收 <img>、<video> 或 <canvas>,回傳每個物件的類別、信心分數與 bounding box。
TensorFlow.js coco-ssd 是什麼?
TensorFlow.js coco-ssd 是 COCO-SSD 模型的瀏覽器版本。TensorFlow.js coco-ssd 會定位圖片中的多個物件,並回傳類別名稱、信心分數與外框座標。
COCO-SSD 是以 Single Shot MultiBox Detector(SSD)概念做物件偵測的模型,TensorFlow.js 版本由 tfjs-models 提供(TensorFlow.js Models,存取日期:2026-08-28)。SSD 的重點是一次完成候選框與類別預測,適合需要即時或近即時回應的前端展示。
這個模型偵測的類別來自 COCO Dataset。COCO Dataset 是常用的大型物件偵測、分割與圖像字幕資料集;TensorFlow.js coco-ssd 預設可偵測 classes.ts 中定義的 80 類物件,例如 person、cat、dog、chair、bottle 等(COCO Dataset,存取日期:2026-08-28)。
TensorFlow.js coco-ssd 可以接收哪些輸入?
TensorFlow.js coco-ssd 可以接收瀏覽器中的圖片、影片與畫布元素。模型不要求使用者理解訓練流程,前端只要把可讀取的 DOM 元素交給 model.detect()。
常見輸入元素如下:
| 輸入元素 | 適合情境 | 注意事項 |
|---|---|---|
<img> | 靜態圖片偵測 | 跨網域圖片需要 CORS 允許讀取 |
<video> | 攝影機或影片串流偵測 | 需要瀏覽器權限與 HTTPS 環境 |
<canvas> | 已加工畫面或遊戲畫面 | 需確認畫布內容不是 tainted canvas |
我最常把 TensorFlow.js coco-ssd 當成前端原型工具:先確認物件類別是否在 COCO 80 類裡,再看偵測速度與信心分數是否足夠。如果需求是自訂類別,瀏覽器版 coco-ssd 就不是終點,後面通常要接自訂模型或改走 TensorFlow Object Detection API。
如何用 TensorFlow.js coco-ssd 偵測一張圖片?
TensorFlow.js coco-ssd 偵測圖片的最小流程是載入兩個 script、取得圖片元素、載入模型,再呼叫 model.detect(img)。predictions 會是一組偵測結果陣列。
以下範例保留我當時整理的官方教學寫法。因為 cocoSsd 和 tf 都透過 script tag 掛在頁面上,所以範例裡不需要 import。
<!-- Load TensorFlow.js. This is required to use coco-ssd model. -->
<script src="https://cdn.jsdelivr.net/npm/@tensorflow/tfjs"> </script>
<!-- Load the coco-ssd model. -->
<script src="https://cdn.jsdelivr.net/npm/@tensorflow-models/coco-ssd"> </script>

<!-- Replace this with your image. Make sure CORS settings allow reading the image! -->
<img id="img" src="cat.jpg"/>

<!-- Place your code in the script tag below. You can also use an external .js file -->
<script>
  // Notice there is no 'import' statement. 'cocoSsd' and 'tf' is
  // available on the index-page because of the script tag above.

  const img = document.getElementById('img');

  // Load the model.
  cocoSsd.load().then(model => {
    // detect objects in the image.
    model.detect(img).then(predictions => {
      console.log('Predictions: ', predictions);
    });
  });
</script>
predictions 內每筆資料通常會包含 bbox、class 和 score。bbox 是 [x, y, width, height],座標以輸入元素左上角為起點;class 是物件類別;score 是模型對該偵測結果的信心分數。
如何用攝影機做即時物件偵測?
TensorFlow.js coco-ssd 做攝影機偵測時,需要先用 navigator.mediaDevices.getUserMedia() 取得串流,再把 <video> 畫到 <canvas>。模型持續偵測 video frame,canvas 負責顯示畫面與外框。
下面是我當時整理的完整 HTML 範例。程式會列出可用攝影機、按下按鈕後開啟影像串流,接著每 100ms 呼叫一次 model.detect(video),並把偵測框畫在 canvas 上。
<!doctype html>
<html>

<head>
  <meta charset="utf-8">
  <title>Test</title>
  <script src="https://cdn.jsdelivr.net/npm/@tensorflow/tfjs"> </script>
  <script src="https://cdn.jsdelivr.net/npm/@tensorflow-models/coco-ssd"> </script>
</head>

<body>
  <div class="select">
    <label for="videoSource">Video source: </label><select id="videoSource"></select>
  </div>
  <button id="showVideo">Open camera</button>
  <br />
  <!-- Video element to capture camera input -->
  <video id="video" autoplay playsinline style="position: absolute;z-index: -999;"></video><canvas id="canvas"
    width="100%"></canvas>
  <div id="message"></div>
  <script>
    const video = document.getElementById('video');
    const canvas = document.getElementById('canvas');
    const ctx = canvas.getContext('2d');
    document.querySelector('#showVideo').addEventListener('click', e => init(e));
    const videoSelect = document.querySelector('select#videoSource');
    function gotDevices(deviceInfos) {
      console.log(deviceInfos)
      deviceInfos.forEach(deviceInfo => {
        if (deviceInfo.kind == "videoinput") {
          const option = document.createElement('option');
          option.value = deviceInfo.deviceId;
          option.text = deviceInfo.label || `camera ${videoSelect.length + 1}`;
          videoSelect.appendChild(option);
        }
      });
    }
    function gotStream(stream) {
      window.stream = stream; // make stream available to console
      videoElement.srcObject = stream;
      // Refresh button list in case labels have become available
      return navigator.mediaDevices.enumerateDevices();
    }
    window.onload = () => {

      navigator.mediaDevices.enumerateDevices().then(gotDevices).catch(handleError);
      const constraints = {
        audio: { deviceId: audioSource ? { exact: audioSource } : undefined },
        video: { deviceId: videoSource ? { exact: videoSource } : undefined }
      };
      navigator.mediaDevices.getUserMedia(constraints).then(gotStream).then(gotDevices).catch(handleError);
    }


    function getRandomColor() {
      const randomColor = Math.floor(Math.random() * 16777215).toString(16);
      return "#" + ("000000" + randomColor).slice(-6);
    }
    function handleSuccess(stream) {
      const videoTracks = stream.getVideoTracks();
      var predictions = [];
      video.srcObject = stream;
      // When the video is playing, draw it on the canvas
      video.addEventListener('play', () => {
        canvas.width = video.videoWidth;
        canvas.height = video.videoHeight;
        // Continuously draw the video frames on the canvas
        function drawFrame() {
          // Draw the video frame on the canvas
          ctx.drawImage(video, 0, 0, canvas.width, canvas.height);
          const scaleX = canvas.width / video.videoWidth;
          const scaleY = canvas.height / video.videoHeight;

          // Draw the bounding boxes on the canvas
          predictions.forEach(prediction => {
            const x = prediction.bbox[0] * scaleX;
            const y = prediction.bbox[1] * scaleY;
            const width = prediction.bbox[2] * scaleX;
            const height = prediction.bbox[3] * scaleY;

            ctx.strokeStyle = 'blue';
            ctx.lineWidth = 2;
            ctx.strokeRect(x, y, width, height);

            ctx.fillStyle = 'blue';
            ctx.font = '18px Arial';
            ctx.fillText(prediction.class, x, y);
          });
          // Call the drawFrame function again to continuously update the canvas
          requestAnimationFrame(drawFrame);
        }

        // Start drawing video frames
        drawFrame();
        // Load the model.
        cocoSsd.load().then(model => {
          function detectFrame() {
            // detect objects in the image.
            model.detect(video).then(preds => {
              predictions = preds
              setTimeout(detectFrame, 100);
            });
          }
          detectFrame()
        });
      });
    }

    function handleError(error) {
      if (error.name === 'OverconstrainedError') {
        const v = constraints.video;
        alert(`The resolution ${v.width.exact}x${v.height.exact} px is not supported by your device.`);
      } else if (error.name === 'NotAllowedError') {
        alert('Permissions have not been granted to use your camera and ' +
          'microphone, you need to allow the page access to your devices in ' +
          'order for the demo to work.');
      }
      alert(`getUserMedia error: ${error.name}`, error);
    }

    async function init(e) {
      try {
        const stream = await navigator.mediaDevices.getUserMedia({ audio: false, video: { deviceId: videoSelect.value ? { exact: videoSelect.value } : undefined } });
        handleSuccess(stream);
        e.target.disabled = true;
      } catch (e) {
        handleError(e);
      }
    }
  </script>
</body>

</html>
這段範例的關鍵不是 HTML 長度,而是兩個循環分工:requestAnimationFrame(drawFrame) 持續重畫畫面,setTimeout(detectFrame, 100) 控制偵測頻率。偵測不用每個 animation frame 都跑一次,否則瀏覽器主執行緒和模型推論容易互相卡住。
若要把這段範例整理成可直接上線的版本,我會先修三個細節:gotStream() 裡的 videoElement 要對齊前面宣告的 video,audioSource 與 videoSource 要從選單值取得或移除,constraints 若要在 handleError() 使用也要放到可讀到的作用域。這些不是模型問題,而是前端串流範例常見的變數整理問題。
執行成果要怎麼看?
TensorFlow.js coco-ssd 的執行成果要同時看外框位置、類別名稱與信心分數。畫面有標到物件不代表模型完全正確,仍要確認 COCO 類別是否符合任務需求。
我當時的測試畫面如下。範例在瀏覽器中開啟攝影機後,把偵測結果畫到 canvas 上;若想要顯示更完整的標籤,可以把 prediction.class 和 prediction.score 一起畫出來。
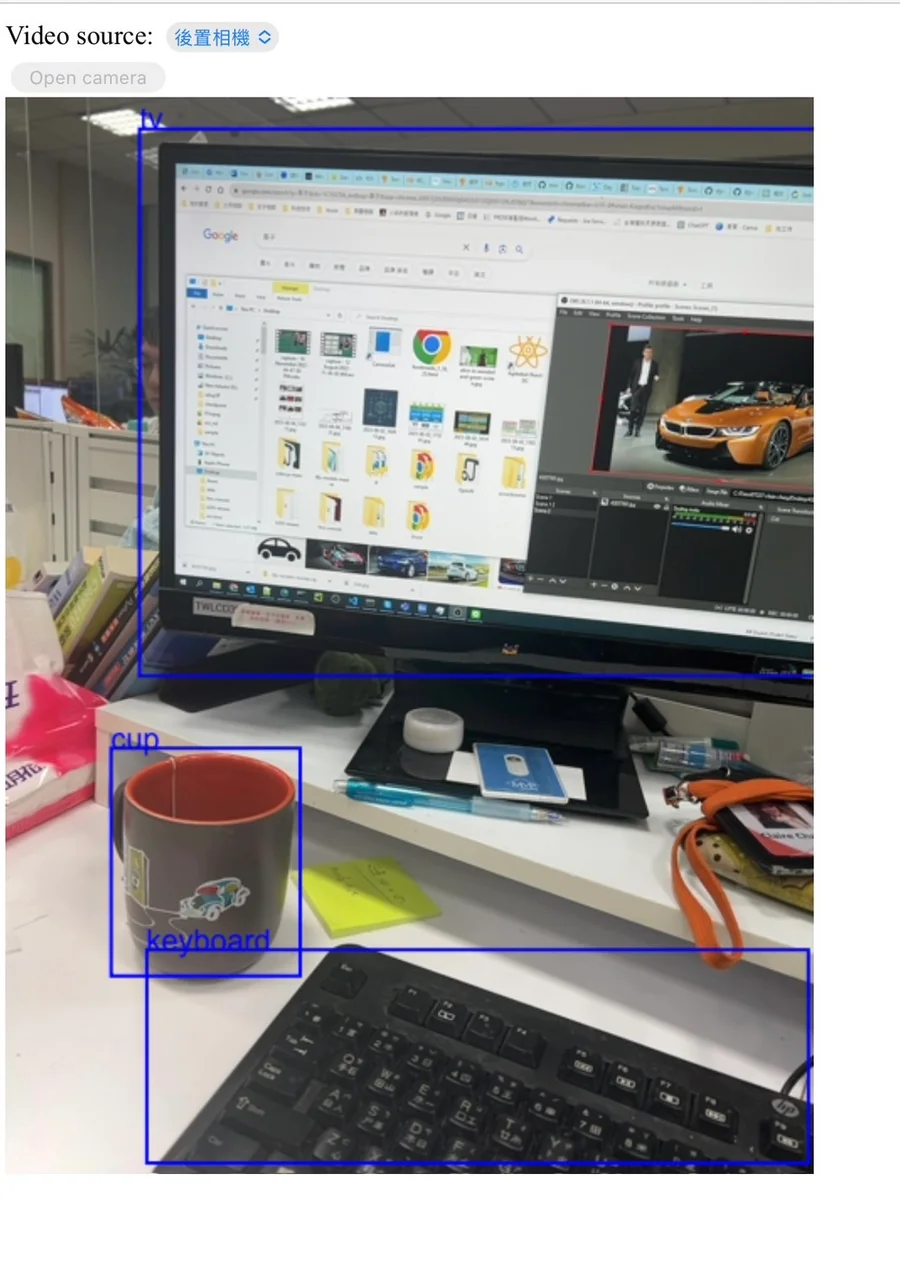
實作時我會特別看三個地方:
bbox是否跟畫面上的物件位置一致。prediction.class是否落在 COCO 80 類裡,而且符合任務要找的物件。prediction.score是否穩定,不是偶爾閃一下才高分。
若外框整體偏移,通常是 video 尺寸、canvas 尺寸或縮放比例沒有對齊。範例中用 scaleX 和 scaleY 把偵測座標換算到 canvas 尺寸,這一步對即時畫框很重要。
攝影機權限和瀏覽器環境要注意什麼?
TensorFlow.js coco-ssd 使用攝影機時,瀏覽器必須允許網站讀取 camera。正式測試建議使用 HTTPS 或 localhost,並在網站設定裡確認攝影機權限已開啟。
要開啟鏡頭權限時,可以到瀏覽器的網站設定中調整 camera 權限。這是 getUserMedia() 最常遇到的卡點:程式沒有錯,但瀏覽器因為安全限制不讓頁面取得影像串流。
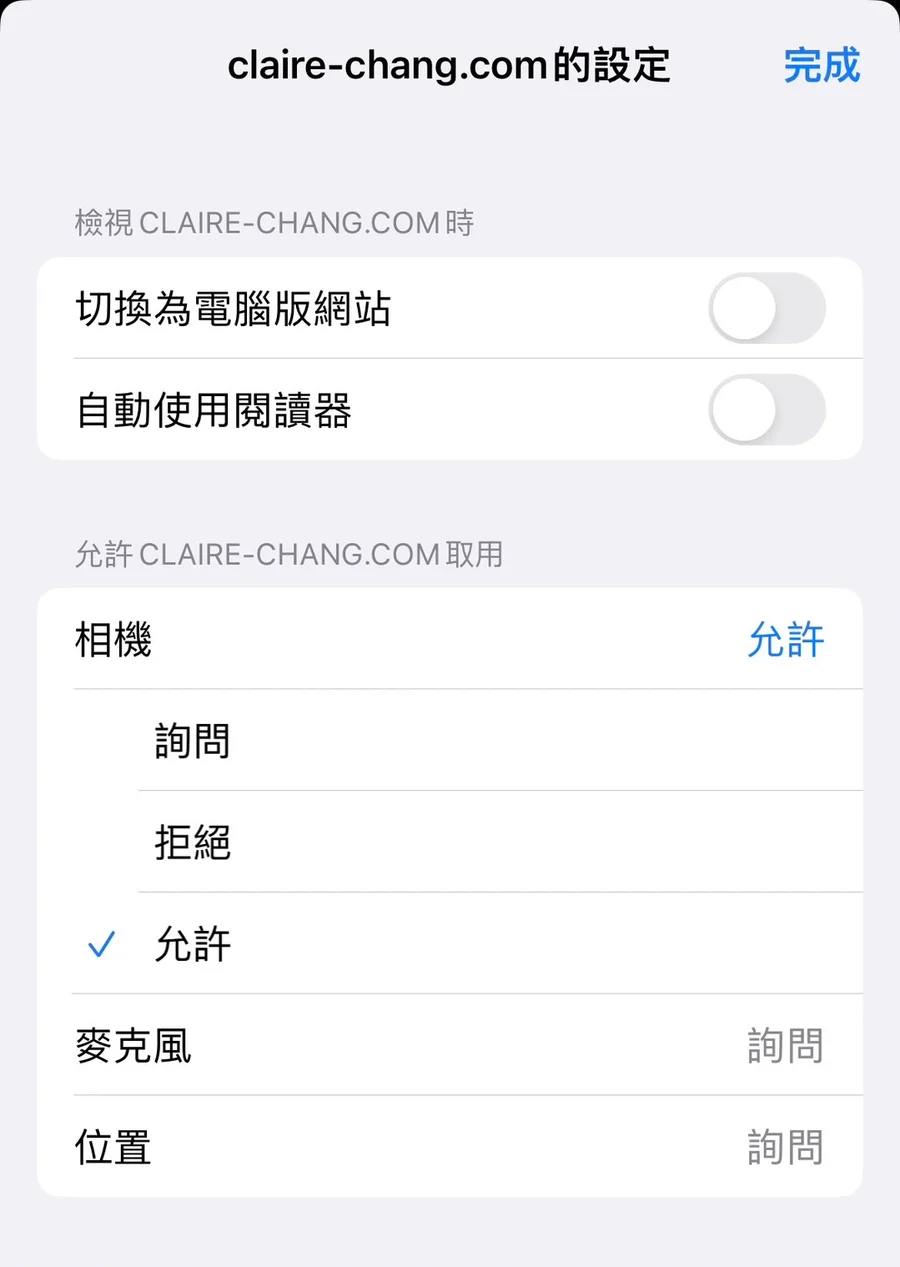
我會用這份檢查表排查:
| 檢查項目 | 判斷方式 |
|---|---|
| 是否使用 HTTPS 或 localhost | 非安全來源可能無法使用攝影機 |
| camera 權限是否允許 | 瀏覽器網址列或網站設定可以確認 |
| 是否選到正確裝置 | enumerateDevices() 會列出可用 videoinput |
| canvas 尺寸是否等於 video 尺寸 | 尺寸不一致會讓外框位置偏移 |
| 是否過度頻繁偵測 | 偵測頻率太高會造成畫面卡頓 |
TensorFlow.js coco-ssd 適合哪些任務?
TensorFlow.js coco-ssd 適合瀏覽器端快速展示、教學原型與 COCO 類別內的即時物件偵測。自訂物件、精度要求高或需要後端管線的專案,通常要改用其他訓練與部署流程。
我會用這個判斷方式選工具:
| 任務條件 | TensorFlow.js coco-ssd 是否適合 |
|---|---|
| 想在瀏覽器快速展示物件偵測 | 適合 |
| 物件屬於 COCO 80 類 | 適合先測 |
| 需要完全離線前端 Demo | 可行,但要處理模型檔案載入 |
| 需要偵測公司內部自訂零件 | 不適合直接使用預訓練 coco-ssd |
| 需要訓練自訂資料集 | 建議看 TensorFlow Object Detection API 或其他訓練框架 |
資訊增益放在工程判斷上:TensorFlow.js coco-ssd 的優點是快上手,限制也很清楚。當目標是「前端先看得到效果」,TensorFlow.js coco-ssd 很方便;當目標是「穩定辨識自訂場景」,模型類別、資料集和評估流程才是主問題。
常見問題
TensorFlow.js coco-ssd 的常見問題多半集中在模型用途、輸入格式、攝影機權限與 COCO 類別限制。以下回答以瀏覽器實作與初學除錯為主。
TensorFlow.js coco-ssd 需要先訓練模型嗎?
TensorFlow.js coco-ssd 不需要先訓練模型。@tensorflow-models/coco-ssd 提供可直接載入的預訓練模型,適合先做瀏覽器端物件偵測原型。
TensorFlow.js coco-ssd 可以偵測哪些物件?
TensorFlow.js coco-ssd 可以偵測 COCO Dataset 類別清單中的 80 類物件。若要偵測不在清單內的自訂物件,就需要改用自訂模型或重新訓練流程。
model.detect() 回傳的 bbox 是什麼格式?
model.detect() 回傳的 bbox 通常是 [x, y, width, height]。x 和 y 代表外框左上角,width 和 height 代表外框寬高,單位是輸入元素上的像素座標。
瀏覽器為什麼不能開啟攝影機?
瀏覽器不能開啟攝影機時,先檢查網站是否使用 HTTPS 或 localhost,再檢查 camera 權限是否允許。若使用者拒絕權限,getUserMedia() 會回傳 NotAllowedError。
TensorFlow.js coco-ssd 可以用在正式產品嗎?
TensorFlow.js coco-ssd 可以用在正式產品的前端推論場景,但要先驗證速度、精度、裝置效能、隱私與錯誤處理。若任務需要自訂類別或高可靠度,建議建立自己的資料集與評估流程。
TensorFlow.js coco-ssd 和 TensorFlow Object Detection API 有什麼不同?
TensorFlow.js coco-ssd 偏向瀏覽器端快速推論,適合用 JavaScript 做展示或原型。TensorFlow Object Detection API 偏向 Python 生態中的模型選擇、訓練、微調與部署流程。
參考資料
本文主要參考 TensorFlow.js Models、TensorFlow Object Detection API 與 COCO Dataset 的官方資料,並保留我當時的瀏覽器攝影機實作範例。
- TensorFlow.js Models,〈coco-ssd〉,存取日期:2026-08-28。
- TensorFlow Object Detection API,〈README〉,存取日期:2026-08-28。
- TensorFlow.js Models,〈COCO-SSD classes.ts〉,存取日期:2026-08-28。
- COCO Dataset,〈Common Objects in Context〉,存取日期:2026-08-28。
- MDN Web Docs,〈MediaDevices: getUserMedia()〉,存取日期:2026-08-28。
延伸閱讀
- YOLOv8 使用範例:Roboflow 資料集訓練與 best.pt 即時偵測:同樣聚焦 物件偵測,可接著比較不同情境的做法。
- TensorFlow Object Detection API 程式使用範例:即時攝影機偵測流程:同屬「機器學習」主題,可延伸理解相近問題的判斷方式。
- OpenCV Template Matching 教學:在圖像中查找物件與縮放旋轉限制:同樣聚焦 物件偵測,可接著比較不同情境的做法。
最後更新
本文最後更新於 2026-08-28。我當時的筆記發布於 2023-08-04,本文保留 TensorFlow.js coco-ssd 圖片偵測、攝影機偵測、執行成果與權限設定內容,並補上 GEO Answer Blocks、FAQ、參考資料與站內延伸閱讀。
關於作者
Claire Chang | 企業 AI 導入與流程轉型顧問。專注於 AI Agent 架構設計、ERP 系統整合與企業 AI 治理。
首次發布:2023-08-04