安裝labelImg來標記物件
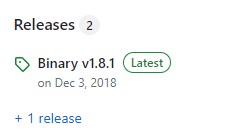
到GitHub官網上面可以下載release的版本
下載網址labelImg

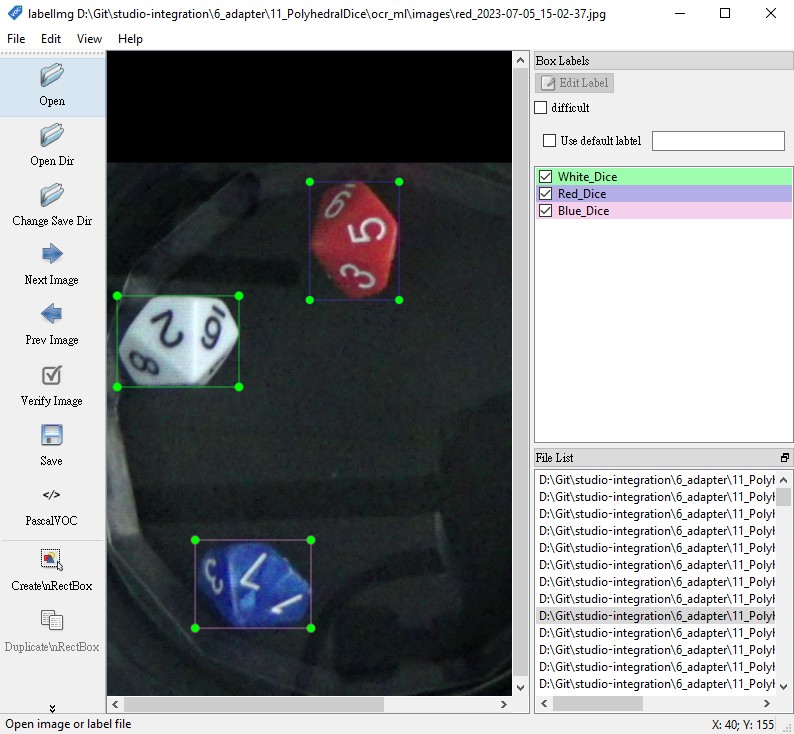
labelImg操作介面

準備訓練用資料集
以下是一個基本步驟:
- 資料準備:準備你的圖像和標籤,並將其轉換成適合 TensorFlow 模型訓練的格式。這通常是使用 TensorFlow 的 TFRecord 格式。如果你的資料不是這種格式,你可以使用 TensorFlow 的
tf.Example類別來轉換它。你需要為每個圖像創建一個tf.Example,該例包含圖像數據以及每個目標的邊界框和類別。 - 下載並選擇模型:從 TensorFlow Object Detection API 的 模型 zoo 下載 SSD MobileNet V2 FPNLite 640×640。這是一個已經在 COCO 數據集上預訓練的模型,可以用來微調。
- 修改配置文件:每個模型都附帶一個配置文件(pipeline.config),它定義了訓練過程中使用的各種參數。例如,它指定了模型架構,輸入尺寸,訓練策略等等。你需要修改這個配置文件以適應你的資料。例如,你需要更改
num_classes參數以反映你的資料中的類別數量,並且需要更改input_path和label_map_path參數以指向你的訓練和驗證數據。 - 訓練模型:然後,你可以使用 TensorFlow Object Detection API 的
model_main_tf2.py腳本來訓練你的模型。你需要將pipeline_config_path參數設置為你的配置文件的位置,並將model_dir參數設置為你希望保存訓練模型的位置。 - 評估模型:在訓練過程中和訓練完成後,你應評估模型的性能。這也可以使用
model_main_tf2.py腳本來完成,只需將checkpoint_dir參數設置為包含你的訓練模型檢查點的目錄。 - 導出模型:一旦你對模型的性能滿意,你可以使用
exporter_main_v2.py腳本將其導出為用於推理的圖模型。
將圖片和標籤轉換成TFRecord格式
以下為一個範例程式
import os
import tensorflow as tf
from object_detection.utils import dataset_util, label_map_util

# 適應你的標籤。標籤字典應該映射類別名稱到整數ID。
labels_path = 'path_to_your_labels.pbtxt'
label_map = label_map_util.load_labelmap(labels_path)
categories = label_map_util.convert_label_map_to_categories(label_map, max_num_classes=90)
category_index = label_map_util.create_category_index(categories)

def create_tf_example(image_path, annotations_list):
    # 從圖像檔案讀取數據並將其轉換為tf.Example。

    img_data = tf.io.gfile.GFile(image_path, 'rb').read()
    img = Image.open(image_path)
    width, height = img.size

    filename = image_path.encode('utf8')
    image_format = b'jpeg'  # or b'png'

    xmins = []  # List of normalized left x coordinates in bounding box (1 per box)
    xmaxs = []  # List of normalized right x coordinates in bounding box (1 per box)
    ymins = []  # List of normalized top y coordinates in bounding box (1 per box)
    ymaxs = []  # List of normalized bottom y coordinates in bounding box (1 per box)
    classes_text = []  # List of string class name of bounding box (1 per box)
    classes = []  # List of integer class id of bounding box (1 per box)

    for ann in annotations_list:
        xmins.append(float(ann['xmin']) / width)
        xmaxs.append(float(ann['xmax']) / width)
        ymins.append(float(ann['ymin']) / height)
        ymaxs.append(float(ann['ymax']) / height)
        classes_text.append(ann['class'].encode('utf8'))
        classes.append(category_index[ann['class']]['id'])

    tf_example = tf.train.Example(features=tf.train.Features(feature={
        'image/height': dataset_util.int64_feature(height),
        'image/width': dataset_util.int64_feature(width),
        'image/filename': dataset_util.bytes_feature(filename),
        'image/source_id': dataset_util.bytes_feature(filename),
        'image/encoded': dataset_util.bytes_feature(img_data),
        'image/format': dataset_util.bytes_feature(image_format),
        'image/object/bbox/xmin': dataset_util.float_list_feature(xmins),
        'image/object/bbox/xmax': dataset_util.float_list_feature(xmaxs),
        'image/object/bbox/ymin': dataset_util.float_list_feature(ymins),
        'image/object/bbox/ymax': dataset_util.float_list_feature(ymaxs),
        'image/object/class/text': dataset_util.bytes_list_feature(classes_text),
        'image/object/class/label': dataset_util.int64_list_feature(classes),
    }))
    return tf_example

writer = tf.io.TFRecordWriter('path_to_output.tfrecord')

# 適應你的圖像路徑和標籤。
images_path = 'path_to_your_images'
annotations_path = 'path_to_your_annotations'

for image_file in os.listdir(images_path):
    image_path = os.path.join(images_path, image_file)
    annotation_path = os.path.join(annotations_path, image_file.replace('.jpg', '.xml'))

    # 讀取標籤檔案並解析標籤。你可能需要根據你的標籤格式調整這個。
    with open(annotation_path) as f:
        annotation_xml = f.read()
    annotations = parse_annotations(annotation_xml)  # 這個函數根據你的標籤格式。

    tf_example = create_tf_example(image_path, annotations)
    writer.write(tf_example.SerializeToString())

writer.close()
準備分類設定檔案*.pbtxt
接著上面會產出path_to_output.tfrecord這個檔案,到object detection裡新建一個資料夾,把path_to_output.tfrecord丟進去。
接著,修改mscoco_label_map.pbtxt(可在\models\research\object_detection\data找到此檔案),檔案內容如下:
item {
  name: "/m/01g317"
  id: 1
  display_name: "person"
}
item {
  name: "/m/0199g"
  id: 2
  display_name: "bicycle"
}
item {
  name: "/m/0k4j"
  id: 3
  display_name: "car"
}
...
這邊的/m/01g317是一個在Google Knowledge Graph中的專屬識別碼(獨特的標籤),用來代表特定的實體或概念。在這裡,/m/01g317是代表”person”(人)這個概念的識別碼。
Google Knowledge Graph是一個大型的知識庫,由Google建立和維護,用來增強其搜索引擎的搜索結果,提供更準確和詳細的資訊。它儲存了數以億計的物件和實體以及他們之間的連結。每個物件或實體都被分配一個獨特的ID,這就是這裡提到的/m/01g317。
在訓練物體檢測模型時,這些識別碼會被用於表示各種可以識別的物體或實體。例如,在你給出的配置中,/m/01g317被指定為表示”person”。
如果你是在自己的專案中,並且與Google Knowledge Graph無關,那麼可以自由地創建你自己的類別標籤或ID。例如,你可以簡單地使用數字(如1,2,3等)或有意義的名稱作為你的類別標籤。在你給出的配置項中,只需要確保每個類別的name和id是唯一的,並且display_name清楚地表示了該類別的含義。
於pipeline.config指定資料集的位置
在pipeline.config檔案中,你將會找到兩個主要的部分,分別代表訓練和驗證數據集,它們的名稱通常為 train_input_reader 和 eval_input_reader。
例如
model {
  // Model settings go here
  ...
}

train_config {
  // Training settings go here
  ...
}

train_input_reader: {
  tf_record_input_reader {
    input_path: "path_to_train.tfrecord"
  }
  label_map_path: "path_to_label_map.pbtxt"
}

eval_config {
  // Evaluation settings go here
  ...
}

eval_input_reader: {
  tf_record_input_reader {
    input_path: "path_to_eval.tfrecord"
  }
  label_map_path: "path_to_label_map.pbtxt"
}
在這個配置檔案中,path_to_train.tfrecord 和 path_to_eval.tfrecord 是你的訓練和驗證TFRecord檔案的路徑。你需要將這些路徑換成你的TFRecord檔案的實際路徑。
路徑path_to_train.tfrecord和path_to_label_map.pbtxt通常是指向文件系统上的絕對路徑,不是相對於pipeline.config文件的相對路徑。
例如,如果你的訓練TFRecord文件位於/home/user/dataset/train.tfrecord,你應該這樣設置:
train_input_reader: {
  tf_record_input_reader {
    input_path: "/home/user/dataset/train.tfrecord"
  }
  label_map_path: "/path_to/your_label_map.pbtxt"
}
train_input_reader和eval_input_reader分別用於指定訓練數據和評估數據的路徑。這些數據通常是標註過的圖像,已經被轉化為TFRecord格式。
使用自訂資料集進行訓練
訓練模型的指令:
python models/research/object_detection/model_main_tf2.py \
    --pipeline_config_path=path_to_your_pipeline.config \
    --model_dir=path_to_output_model_dir \
    --alsologtostderr