Posted on

[24- Pixi教學] 提示、重整按鈕功能實作

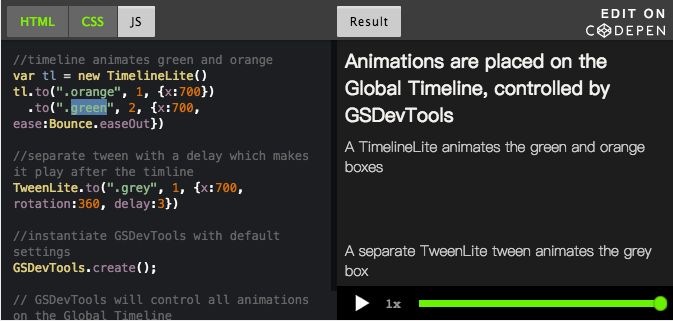
實作提示按鈕

新增檔案TipBtn.ts,內容如下:

import { ButtonBase } from "./ButtonBase";
import { eventEmitter } from "../Main";
import { GameFlowEvent } from "../core/Event";

export class TipBtn extends ButtonBase {
    constructor() {
        super('Button','Tip',50,287);
    }

    public trigger(){
        eventEmitter.emit(GameFlowEvent.TipsRequest);
    }
}

在GameBoard.ts裡的constructor監聽TipsRequest事件

eventEmitter.on(GameFlowEvent.TipsRequest,this.showTips.bind(this));

並新增所需要的方法

    private tipsPath:Path;
    showTips = ()=>{
        this.tipsPath = board.getFirstExistPath();
        let icon1 = this.getChildByName('icon_'+this.tipsPath.point1.x+"_"+this.tipsPath.point1.y) as GameIcon;
        icon1.select();//為可連線的方塊增加紅框提示玩家

        let icon2 = this.getChildByName('icon_'+this.tipsPath.point2.x+"_"+this.tipsPath.point2.y) as GameIcon;
        icon2.select();
        SoundMgr.play('Tips');
    }

因為若玩家此時選擇了其他的方塊,我們需要把提示的框消除掉以避免混淆

    createIcon = (id, x, y)=>{
        let icon = new GameIcon(id,x,y);
        this.addChild(icon);
        let iconClickHandler = ()=>{
            this.cancelTips();//在這時將提示的框消除
            if (this.selected) {
                //...
            }
        }
    }

並實作消除提示紅框的功能

    cancelTips=()=>{
        if(this.tipsPath == null){
            return;
        }
        let icon1 = this.getChildByName('icon_'+this.tipsPath.point1.x+"_"+this.tipsPath.point1.y) as GameIcon;
        if(icon1) icon1.unSelect();

        let icon2 = this.getChildByName('icon_'+this.tipsPath.point2.x+"_"+this.tipsPath.point2.y) as GameIcon;
        if(icon2) icon2.unSelect();
    }

實作重整按鈕

新增檔案ReloadBtn.ts,內容如下:

import { ButtonBase } from "./ButtonBase";
import { eventEmitter } from "../Main";
import { GameFlowEvent } from "../core/Event";
import { reloadTimes } from "./GameBoard";

export class ReloadBtn extends ButtonBase {
    constructor() {
        super('Button','Reflash',50,230);
        eventEmitter.on(GameFlowEvent.GameRoundStart,(()=>{
            this.enable = true;
        }).bind(this))
    }
    public trigger(){
        if(reloadTimes > 0){
            eventEmitter.emit(GameFlowEvent.ReloadBoardRequest);
        }
        if(reloadTimes == 0){
            this.enable = false;
        }
    }
}

在GameBoard.ts裡的constructor監聽ReloadBoardRequest事件

eventEmitter.on(GameFlowEvent.ReloadBoardRequest, this.reloadBoard.bind(this));

並實作所需的方法

    reloadBoard = ()=>{
        this.reloadTimes--;
        do{
            board.rearrangeBoard();
        }while(board.getFirstExistPath() == null)
        this.drawBoardIcon();
        SoundMgr.play('ReloadBoard');
    }

今日成果

線上demo:http://claire-chang.com/ironman2018/1108/
今日成果下載:ironman20181108

Posted on

[23- Pixi教學] 復原按鈕功能實作

堆疊與佇列

堆疊 (Stack)

  • 加入(push)與刪除(pop)於同一端
  • 具有後進先出(LIFO, Last-in-First-out)或先進後出(FILO, First-in-Last-out)性質的有序串列
  • 例子:疊盤子、發牌、走迷宮

佇列 (Queue)

  • 加入(enqueue)與刪除(dequeue)於不同端(front & rear)
  • 先進先出(FIFO, First-in-First-out)
  • 例子:排隊買票、坐公車

實作復原功能

復原功能比較像是走迷宮,一定是先從最後一步開始復原,因此這邊我們採用堆疊的方式。堆疊最簡單的實作方式就是使用array,並用pop以及push來塞入、取出資料。

首先先創建一個類別名為RevertBtn.ts

import { ButtonBase } from "./ButtonBase";
import { eventEmitter } from "../Main";
import { GameFlowEvent } from "../core/Event";

export class RevertBtn extends ButtonBase {

    constructor() {
        super('Button','Revert',50,345);
    }
    public trigger(){
        eventEmitter.emit(GameFlowEvent.RevertBackRequest);
    }
}

接著在GameScene.ts加入RevertBtn這個按鈕

export class GameScene {

    public static draw(){
        //加入背景
        application.stage.addChild(PIXI.Sprite.from(Loader.resources["background"].texture));
        //加入按鈕
        application.stage.addChild(new SoundBtn());
        application.stage.addChild(new RevertBtn());
        //加入連連看牌面
        application.stage.addChild(new GameBoard());
        application.stage.addChild(LinkedLine.instance);
        //角色動畫
        application.stage.addChild(new Character());
    }
}

然後去GameBoard.ts註冊GameFlowEvent.RevertBackRequest這個事件

    constructor() {
        super();
        this.createNewGame();
        this.x = 175;
        this.y = 20;

        eventEmitter.on(GameFlowEvent.RevertBackRequest,this.revertBoard.bind(this));
    }

並新增revertBoard的方法

    revertBoard = ()=>{
        let value = this.valueHistory.pop();
        let path = this.pathHistory.pop();
        if(value != null && path != null){
            board.board[path.point1.x][path.point1.y] = value;
            board.board[path.point2.x][path.point2.y] = value;

            this.drawBoardIcon();
            SoundMgr.play('Back');
        }
    }ack');
        }
    }

然後在每次成功連線時,將成功連線的方塊的值和位置存進陣列裡

createIcon = (id, x, y)=>{
        let icon = new GameIcon(id,x,y);
        this.addChild(icon);
        let iconClickHandler = ()=>{
            if (this.selected) {
                let selectCorrect = false;
                this.select2 = new Point(x, y);
                this.iconSelected(this.select2);
                setTimeout(()=>{
                    if (board.hasSameValue(this.select1, this.select2)) {
                        if (! (this.select1.x == x && this.select1.y == y) ) {
                            let path = new Path(this.select1, this.select2, board);
                            if(path.canLinkInLine()){
                                this.pathHistory.push(path);//存入選擇的點
                                this.valueHistory.push(board.getValue(this.select1));//存入消掉的符號id
                                LinkedLine.instance.drawPath(path);
                                this.clearIcon(this.select1);
                                this.clearIcon(this.select2);
                                eventEmitter.emit(GameFlowEvent.LinkedLineSuccess);
                                selectCorrect = true;
                                //判斷還有沒有路走
                                if(board.gameRoundEnd()){
                                    alert("恭喜完成遊戲!");
                                    this.createNewGame();
                                }else if(board.getFirstExistPath() == null){
                                    this.reloadTimes--;
                                    board.rearrangeBoard();
                                }
                            }
                        }
                    }
                    if(selectCorrect){
                        SoundMgr.play('Sound_select_crrect');
                    }else{
                        SoundMgr.play('Sound_select_error');
                        this.iconUnSelected(this.select1);
                        this.iconUnSelected(this.select2);
                    }
                    this.selected = false;
                },0);

            } else {
                this.select1 = new Point(x, y);
                this.iconSelected(this.select1);
                this.selected = true;
                SoundMgr.play('Sound_select_1');

            }
        };
        icon.on("click", iconClickHandler);
        icon.on("tap", iconClickHandler);
    }

今日成果

線上展示:http://claire-chang.com/ironman2018/1107
今日成果下載: ironman20181107

Posted on Leave a comment

[22- Pixi教學] 按鈕動態- Tween

GreenSock

下面是GSAP官網對這個產品的說明:

Think of GSAP as the Swiss Army Knife of javascript animation…but better. It animates anything JavaScript can touch (CSS properties, canvas library objects, SVG, generic objects, whatever) and it solves countless browser inconsistencies, all with blazing speed (up to 20x faster than jQuery), including automatic GPU-acceleration of transforms.

因為GSAP可以使用GPU加速,因此在執行速度效能上會勝過jQuery,也因為它是很單純的去漸變改變某個屬性,所以我們可以很容易的使用在任何我們可操控的屬性上去製作動畫效果,是一個十分強大好用的工具。

要嘗試動畫效果的樣式和程式寫法,官網有提供GSDevTools可供我們使用,可以更容易的編輯我們要的動畫樣式

TweenLite

TweenLiteTweenMax是當我們只有一個Tween時可使用的,例如:把一個物件從左邊移到右邊。

TweenLite.to(".grey", 1, {x: 700, rotation: 360, delay:3, id:"grey"})

而這兩個類別的差異在於TweenMax提供更多的參數和方法可供我們使用

TimelineLite

TimelineLiteTimelineMax則是當我們要做一系列的Tween時可使用的,例如:某按鈕按下去要先放大再縮小再彈回來。

var tl = new TimelineMax({repeat:2, repeatDelay:1});
tl.add( TweenLite.to(element, 1, {scale:0.9}) );
tl.add( TweenLite.to(element, 1, {scale:1.1}) );
tl.add( TweenLite.to(element, 1, {scale:1}) );

而TimelineLite與TimelineMax的差異也是TimelineMax提供更多方法和參數可以使用。

為按鈕加Tween效果

首先我們要在專案裡加入使用gsap
npm install gsap
以及@types/gsap
npm install –save @types/gsap
設定在build的時後要複製TweenLite.min.js及TimelineMax.min.js到libs裡(gulpfile.js)

gulp.task('libs', () => {
    return gulp
        .src([
            'node_modules/jquery/dist/jquery.min.js',
            'node_modules/jquery/dist/jquery.min.map',
            'node_modules/systemjs/dist/system-polyfills.js',
            'node_modules/systemjs/dist/system-polyfills.js.map',
            'node_modules/systemjs/dist/system.js',
            'node_modules/systemjs/dist/system.js.map',
            'node_modules/pixi.js/dist/pixi.min.js',
            'node_modules/pixi.js/dist/pixi.min.js.map',
            'node_modules/howler/dist/howler.core.min.js',
            'node_modules/gsap/src/minified/TweenLite.min.js',
            'node_modules/gsap/src/minified/TimelineMax.min.js '
        ])
        .pipe(gulp.dest("build/lib"));
});  

並在index.js裡加上

  <script src="lib/TweenLite.min.js"></script>
  <script src="lib/TimelineMax.min.js"></script>

接著修改ButtonBase.ts的內容如下:

import Sprite = PIXI.Sprite;
import {Loader} from "../core/Loader";
//add gasp
declare const TweenLite;
declare const TimelineMax;

export class ButtonBase extends Sprite{

    constructor(_id:string, textureID:string, _x:number, _y:number) {
        super();
        this.texture = Loader.resources[_id].textures[textureID];
        this.interactive = true;
        this.buttonMode = true;
        this.x = _x;
        this.y = _y;
        this.anchor.set(0.5);

        //按下效果
        this.on("mousedown", this.mouseDownEffect.bind(this));
        this.on("mouseup", this.mouseUpEffect.bind(this));
        this.on("mouseout", this.mouseOutEffect.bind(this));
        this.on("touchstart", this.mouseDownEffect.bind(this));
        this.on("touchend", this.mouseUpEffect.bind(this));

        this.on("mouseup", this.trigger.bind(this));
        this.on("touchend", this.trigger.bind(this));
    }
    public trigger(){
    }
    private _enable:boolean = true;
    public set enable(v:boolean){
        this.interactive = v;
        this.buttonMode = v;
        this.alpha = v ? 1:0.5;
    }
    //滑鼠按下時會先縮小
    public mouseDownEffect():void{
        let animTweenTimeline = new TimelineMax();
        animTweenTimeline.add(new TweenLite(this, 0.2,
            {
                "scaleX": 0.9,
                "scaleY": 0.9
            }));
        animTweenTimeline.play();
    }
    //滑鼠移開時先放大再縮小
    public mouseUpEffect():void{
        let animTweenTimeline = new TimelineMax();
        animTweenTimeline.add(new TweenLite(this, 0.1,
            {
                "scaleX": 1.1,
                "scaleY": 1.1
            }));
        animTweenTimeline.add(new TweenLite(this, 0.1,
            {
                "scaleX": 1,
                "scaleY": 1
            }));
        animTweenTimeline.play();
    }
    set scaleX(v:number){
        this.scale.x = v;
    }
    set scaleY(v:number){
        this.scale.y = v;
    }
    public mouseOutEffect():void{
        this.scale.set(1,1);
    }
}

今日成果

線上成果展示:http://claire-chang.com/ironman2018/1106/
今日成果下載:ironman20181106

Posted on Leave a comment

[21- Pixi教學] 連線效果實作-Graphics

連連看連線及選擇題示

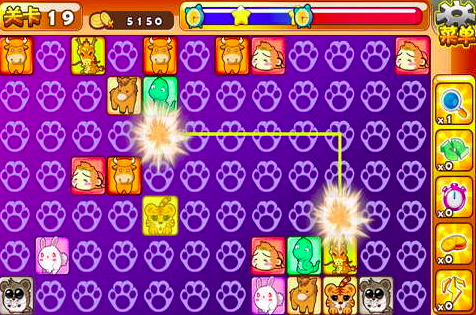
在進行遊戲時,清楚的玩家操作說明及互動是很重要的遊戲要素。因此,像一般的連連看遊戲,都會在玩家選擇圖示之後,把玩家所選擇的圖示做效果,提示玩家已經選擇了某個符號。並且在玩家選擇了第二個符號且連線成功時,會顯示所經過的路徑,並畫出一條線來消除這兩個符號,如下圖:

在這一篇裡,我們就要實做這樣的功能。

Graphics

這邊是官網使用Graphics的一個使用範例:Graphics
這是API說明:http://pixijs.download/release/docs/PIXI.Graphics.html
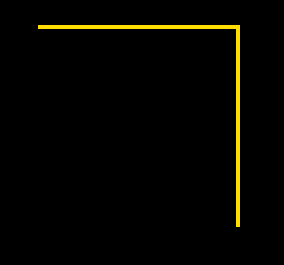
下面是畫線的一個簡單範例:

var app = new PIXI.Application(800, 600, { antialias: true });
document.body.appendChild(app.view);

var graphics = new PIXI.Graphics();

// set a line style
graphics.lineStyle(4, 0xffd900, 1);

// draw a shape
graphics.moveTo(50,50);
graphics.lineTo(250, 50);
graphics.lineTo(250, 250);
graphics.endFill();

app.stage.addChild(graphics);

成果如下:

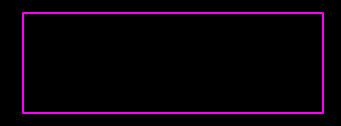
而這是畫矩型的一個簡單範例:

var app = new PIXI.Application(800, 600, { antialias: true });
document.body.appendChild(app.view);

var graphics = new PIXI.Graphics();

// draw a rounded rectangle
graphics.lineStyle(2, 0xFF00FF, 1);
graphics.beginFill(0xFF00BB, 0);
graphics.drawRoundedRect(150, 450, 300, 100, 1);
graphics.endFill();

app.stage.addChild(graphics);

成果如下:

為方塊加上選取效果

在過去,我們在產生方塊是直接new一個Sprite並加入場景,而現在方塊要能夠有被選取、取消選取的功能,因此我們將方塊拉出成為一個獨立的類別GameIcon
其內容如下:

import Sprite = PIXI.Sprite;
import { Loader } from "../core/Loader";

export class GameIcon extends Sprite{
    constructor(id,x,y) {
        super();
        this.texture = Loader.resources['Icon'].textures['icon_' + id];
        this.name = 'icon_' + x + "_" + y;//方便可以從父層更容易的取出這個方塊
        this.width = this.height = 45;
        this.x = (this.width + 20) * x + 22.5;
        this.y = (this.width + 6) * y + 22.5;
        this.anchor.set(0.5);//縮放時可以以中間為中心點
        this.buttonMode = true;
        this.interactive = true;
    }

    //選擇時,繪製邊框,顏色為紅色
    select = ()=>{
        let gt = new PIXI.Graphics();
        gt.lineStyle(3,0xFF0000,1);
        gt.drawRect(-3-22.5,-3-22.5,51,51);
        gt.endFill();
        this.addChild(gt);
    }

    //取消選擇時,將邊框拿掉
    unSelect = ()=>{
        this.removeChildren();
    }
}

接著我們在GameBoard.ts裡,撰寫兩個方法iconSelectediconUnSelected如下:

    iconSelected = (point:Point)=>{
        //根據在GameIcon設定的name來取得正確位置上的方塊
        let icon = this.getChildByName('icon_'+point.x+"_"+point.y) as GameIcon;
        icon.select();
    };

    iconUnSelected = (point:Point)=>{
        let icon = this.getChildByName('icon_'+point.x+"_"+point.y) as GameIcon;
        icon.unSelect();
    };

然後改寫GameBoard.ts裡的createIcon方法

    createIcon = (id, x, y)=>{
        let icon = new GameIcon(id,x,y);//id為要顯示的圖片編號,x,y為位置
        this.addChild(icon);
        let iconClickHandler = ()=>{
            if (this.selected) {
                let selectCorrect = false;
                this.select2 = new Point(x, y);
                this.iconSelected(this.select2);//將方塊加上紅框
                setTimeout(()=>{//為了避免第二個方塊都還沒有繪製到邊框就被取消掉,因此在此增加setTimeout
                    if (board.hasSameValue(this.select1, this.select2)) {
                        if (! (this.select1.x == x && this.select1.y == y) ) {
                            let path = new Path(this.select1, this.select2, board);
                            if(path.canLinkInLine()){
                                this.clearIcon(this.select1);
                                this.clearIcon(this.select2);
                                eventEmitter.emit(GameFlowEvent.LinkedLineSuccess);
                                selectCorrect = true;
                                //判斷還有沒有路走
                                if(board.gameRoundEnd()){
                                    alert("恭喜完成遊戲!");
                                    this.createNewGame();
                                }else if(board.getFirstExistPath() == null){
                                    this.reloadTimes--;
                                    board.rearrangeBoard();
                                }
                            }
                        }
                    }
                    if(selectCorrect){
                        SoundMgr.play('Sound_select_crrect');
                    }else{
                        SoundMgr.play('Sound_select_error');
                        //不能消除,取消紅框
                        this.iconUnSelected(this.select1);
                        this.iconUnSelected(this.select2);
                    }
                    this.selected = false;
                },0);

            } else {
                this.select1 = new Point(x, y);
                this.iconSelected(this.select1);//將方塊加上紅框
                this.selected = true;
                SoundMgr.play('Sound_select_1');

            }
        };
        icon.on("click", iconClickHandler);
        icon.on("tap", iconClickHandler);
    }

為消除加上連線路徑

當成功消除兩個方塊時,應該要有剛剛連線的路徑,這樣使用者才能夠確定連線的方式是正確的,現在我們要為遊戲加上這個功能。

我希望能夠在盤面的上方加上一層圖層,能夠繪製剛剛成功消除的方塊的連線路徑。之前我們在[6 – 遊戲邏輯] 連線消除程式撰寫的地方,所撰寫的Path類別若呼叫canLinkInLine()結果反回為true的話,同時亦會把所經的路徑的點塞入path_Detail這個陣列裡面。

所以這個類別的主要職責,應該是要能夠把輸入的path裡的路徑畫出來。為了要使這個圖層能更方便的在各個地方被取用,我使用了singleton方法來建立這個物件,這樣所有的類別都可以利用LinkedLine.instance來取得這個元件惟一的實體。

下面為LinkedLine.ts的資料

import Container = PIXI.Container;
import Point = PIXI.Point;
import { Path } from "../core/Path";

export class LinkedLine extends Container {

    constructor() {
        super();
        this.x = 175;
        this.y = 20;
    }

    //將這個類別設定為singleton類別
    private static _instance:LinkedLine;
    public static get instance():LinkedLine{
        if(this._instance == null){
            this._instance = new LinkedLine();
        }
        return this._instance;
    }

    //輸入一個path物件,藉由paths.path_Detail來畫出連線
    public drawPath(paths:Path){
        this.removeChildren();
        let point = paths.path_Detail.pop();//取出第一個點
        let gt = new PIXI.Graphics();
        gt.lineStyle(5, 0xff0000);
        let start = this.getPositionFromPoint(point);
        gt.moveTo(start.x,start.y);//先移到第一個點的位置
        do{
            point = paths.path_Detail.pop();//取出後面的點
            let line = this.getPositionFromPoint(point);
            gt.lineTo(line.x,line.y);//繪製連線
        }while(paths.path_Detail.length > 0);

        this.addChild(gt);

        //設定連線會在500毫秒後自動消失
        setTimeout(()=>{this.removeChildren();},500);
    }
    //把遊戲盤面的x,y系統轉化為畫面上實際的坐標系統
    public getPositionFromPoint(point:Point){
        let x = (45 + 20) * point.x + 22.5;
        let y = (45 + 6) * point.y + 22.5;
        if(y < 0){
            y = -5;
        }
        if(y > 502){
            y = 510;
        }
        return new Point(x, y);
    }
}

接著在GameBoard.ts裡連線成功時加上這行來繪製連線

LinkedLine.instance.drawPath(path);

並在GameScene.ts裡加上LinkedLine元件

application.stage.addChild(LinkedLine.instance);

今日成果

線上demo:http://claire-chang.com/ironman2018/1105/
今日成果下載:ironman20181105

Posted on Leave a comment

[20- Pixi教學] 連連看公仔實作- 逐格動畫

動畫物件

在一般的2D遊戲中,動畫可以用2D骨骼動畫製作(如:Spine)、粒子系統(如:Particles)、或者使用Tween(如:gsap)以及逐格動畫來製作。

下面為這四種動畫的介紹:

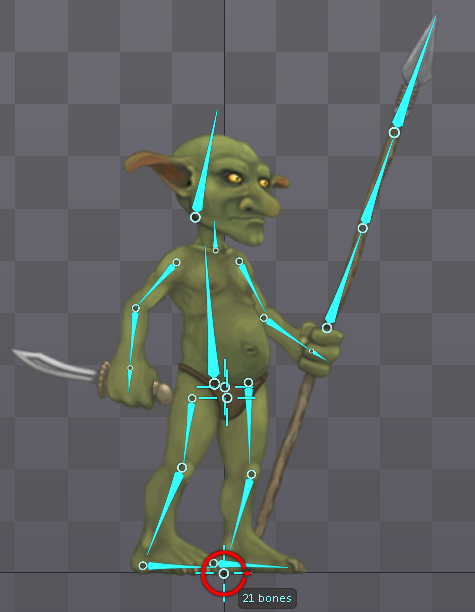
  • 骨骼動畫:針對角色動畫的骨架做設定,並且經由改變骨骼元件方向及變形來讓角色做出如行走、跳躍等動態動作。使用骨骼動畫可以大大降低角色所占的圖像空間,尤其是在2D的遊戲裡,這是不可或缺的技術。
  • 粒子系統:有許多編輯器可以編輯出粒子效果的設定檔,並藉由粒子系統的程式來做出特效。
  • Tween:針對一個物件的某個屬性去設定一段時間將該屬性從a數值變成b數值。可以用在物件位移(更動x、y屬性)、放大縮小(更動scale)、旋轉(更動rotate)等效果上。也可以更改自定義屬性,如跑分效果(將分數慢慢加上去)。
    下面是官網上的一個效果範例:
  • 逐格動畫:逐格動畫是最簡單原始的動畫類型,由許多張的動態圖組合成為一幅動畫。逐格動畫的動畫製作能夠最精緻、最多樣化,但是也需要花最多力氣在繪製圖像,並且會有很大的檔案大小。其原理與一般電影、gif檔相同。

逐格動畫

PIXI.extras.AnimatedSprite是在Pixi.JS裡處理動畫的類別,官網對此類別的說明如下:

An AnimatedSprite is a simple way to display an animation depicted by a list of textures.

也就是可以用來播放由多張連續的圖檔組成的逐格動畫,在前面的[13- 遊戲製作] 素材處理的部份,已經有分享過該如何將連續圖檔打包成所需的格式,在這一章裡,則會在遊戲裡來實際使用這些連續圖檔。

角色動畫需求

在遊戲中,我們希望角色動畫可以在不同的時間播放不同的動畫,讓角色與遊戲能夠更有互動感,播放時機與動畫的設計如下:

    • 待機動畫:播放Character_Idle.json
      消除成功時:播放Character_Laugh.json
      按下提示時:播放Character_Jump.json
  • 角色動畫程式撰寫

    1. 產生動畫元件: 傳入要產生的動畫名稱,然後設定動畫完成後要呼叫的動作。

        createAnim(id:string, onComplete:any){
            let anim = Loader.resources[id].textures;
            let textures = [];
            for(var index in anim) {
                textures.push(anim[index]);
            }
            var character = new PIXI.extras.AnimatedSprite(textures);
            character.play();
            character.animationSpeed = 0.25;
            character.loop = false;
            character.onComplete = onComplete;
            this.addChild(character);
            return character;
        }

    2. 產生動畫並設定handler:因為動畫若播到一半被中斷會很突兀,這邊一律是等到動畫播完後,才會依狀態判斷下一個要播的動畫

        private shouldPlayTarget:string = 'idle';
        constructor(){
            super();
            //每次動畫完成之後,都要判斷下一個要播放的動畫為何
            this.idle = this.createAnim('Character_Idle', this.playAnim.bind(this));
            this.jump = this.createAnim('Character_Jump', this.playAnim.bind(this));
            this.laugh = this.createAnim('Character_Laugh', this.playAnim.bind(this));
    
            eventEmitter.on(GameFlowEvent.LinkedLineSuccess, ()=>{
                this.shouldPlayTarget = 'laugh';//設定下一個要播的動畫
            });
            eventEmitter.on(GameFlowEvent.TipsRequest, ()=>{
                this.shouldPlayTarget = 'jump';
            });
        }
        //依據shouldPlayTarget的值來判斷現在要播的動畫
        //如果沒有特殊要播的動畫的話,則一律播放待機動畫
        playAnim(){
            this.idle.visible = false;
            this.laugh.visible = false;
            this.jump.visible = false;
            this[this.shouldPlayTarget].visible = true;
            this[this.shouldPlayTarget].gotoAndPlay(0);
            this.shouldPlayTarget = 'idle';
        }

    Container特性

    在上面,我們是直接產生三個動畫物件,在需要使用時才會把visible設為true並且播放,因此要小心是否會造成效能問題,在研究了一下Container.js的原始碼,可以發現如果當元件的visible為false時,是不會去render這個物件的,也不會去處理其相關子元件的畫面變更。


    Source:Container.js

    在經過實測後,的確將畫面上不會被看到的元件的visible設為false後,能夠提升畫面的fps,因此這也是開發上一個可以多加利用的小技巧。

    另外,filter的使用,會花費較多的效能,需要謹慎使用。而mask下的物件,即便因為mask而無法看到,仍舊會一直被render,因此即便是已經在mask下因此畫面上無法看見的元件,依然建議要把可試範圍外的物件的visible設為false,以提升遊戲效能。

    今日成果


    線上demo:http://claire-chang.com/ironman2018/1104/
    今日成果下載:ironman1104

    Posted on Leave a comment

    [19- Pixi教學] 連連看盤面實作

    PIXI顯示元件介紹

    PixiJS裡較常使用的顯示元件有:PIXI.ContainerSpriteAnimatedSprite

    PIXI.Container在官網上的解釋如下:

    A Container represents a collection of display objects. It is the base class of all display objects that act as a container for other objects.

    簡而言之Container就是一個可以放其他顯示元件的一個容器,像SpriteAnimatedSprite等也都是繼承自Container的顯示元件,因此也都可以再在裡面放其他的顯示元件。
    下面是一個簡單的使用範例:

    let container = new PIXI.Container();
    container.addChild(sprite);

    Sprite是可以放單張的靜態圖檔元件。

    The Sprite object is the base for all textured objects that are rendered to the screen

    下面是一個簡單的使用範例:

    PIXI.loader.add("assets/spritesheet.json").load(setup);
    
    function setup() {
      let sheet = PIXI.loader.resources["assets/spritesheet.json"].spritesheet;
      let sprite = new PIXI.Sprite(sheet.textures["image.png"]);
      ...
    }

    AnimatedSprite則可以把多張連續的圖檔播放成連續的動畫。

    An AnimatedSprite is a simple way to display an animation depicted by a list of textures.

    下面是一個簡單的使用範例:

    PIXI.loader.add("assets/spritesheet.json").load(setup);
    
    function setup() {
      let sheet = PIXI.loader.resources["assets/spritesheet.json"].spritesheet;
      animatedSprite = new PIXI.extras.AnimatedSprite(sheet.animations["image_sequence"]);
      ...
    }

    連連看邏輯程式

    之前在第一部份我們完成的程式碼在此:ironman20181022

    在這一篇我們要將第一篇所寫完的連線邏輯套入pixiJS版本的連連看遊戲之中。

    搬移邏輯部份的檔案

    在邏輯程式的部份,PathBoardDirection都可以直接移來專案內使用。
    這些程式碼的邏輯解釋在前幾篇的系列文中都有詳細的說明。

    新增Path.ts內容如下:

    import Point = PIXI.Point;
    import {Board} from "./Board";
    import {Direction} from "./Direction";
    
    export class Path {
        public point1:Point;
        public point2: Point;
        readonly board: Board;
        public path_Detail:Array<point>;
    
        constructor(point1: Point, point2: Point, board: Board) {
            this.point1 = point1;
            this.point2 = point2;
            this.board = board;
        }
    
        public canLinkInLine(): boolean {
    
    
            //從上面消
            let point1UP = this.board.getNearByPointByDirection(this.point1, Direction.UP);
            let point2UP = this.board.getNearByPointByDirection(this.point2, Direction.UP);
            {
                let min = Math.max(point1UP.x,point2UP.x);
                let max = Math.min(this.point1.x, this.point2.x);
                for (var i = max;i>=min;i--){
                    if (!this.board.hasMiddleValue(new Point(i, this.point1.y), new Point(i, this.point2.y))){
                        this.path_Detail = [this.point1,new Point(i, this.point1.y),new Point(i, this.point2.y),this.point2];
                        return true;
                    }
                }
            }
            //從下面消
            let point1DOWN = this.board.getNearByPointByDirection(this.point1, Direction.DOWN);
            let point2DOWN = this.board.getNearByPointByDirection(this.point2, Direction.DOWN);
            {
                let max = Math.min(point1DOWN.x,point2DOWN.x);
                let min = Math.max(this.point1.x, this.point2.x);
                for (var i = min;i<=max;i++){
                    if (!this.board.hasMiddleValue(new Point(i, this.point1.y), new Point(i, this.point2.y))){
                        this.path_Detail = &#91;this.point1,new Point(i, this.point1.y),new Point(i, this.point2.y),this.point2&#93;;
                        return true;
                    }
                }
            }
    
            //從左邊消
            let point1LEFT = this.board.getNearByPointByDirection(this.point1, Direction.LEFT);
            let point2LEFT = this.board.getNearByPointByDirection(this.point2, Direction.LEFT);
            {
                let min = Math.max(point1LEFT.y,point2LEFT.y);
                let max = Math.min(this.point1.y, this.point2.y);
                for (var i = max;i>=min;i--) {
                    if (!this.board.hasMiddleValue(new Point(this.point1.x, i), new Point(this.point2.x, i))) {
                        this.path_Detail = [this.point1, new Point(this.point1.x, i), new Point(this.point2.x, i), this.point2];
                        return true;
                    }
                }
            }
    
            //從右邊消
            let point1RIGHT = this.board.getNearByPointByDirection(this.point1, Direction.RIGHT);
            let point2RIGHT = this.board.getNearByPointByDirection(this.point2, Direction.RIGHT);
            {
                let max = Math.min(point1RIGHT.y,point2RIGHT.y);
                let min = Math.max(this.point1.y, this.point2.y);
                for (var i = min;i<=max;i++) {
                    if (!this.board.hasMiddleValue(new Point(this.point1.x, i), new Point(this.point2.x, i))) {
                        this.path_Detail = &#91;this.point1, new Point(this.point1.x, i), new Point(this.point2.x, i), this.point2&#93;;
                        return true;
                    }
                }
            }
            //左右連消
            if (this.point1.y != this.point2.y){
                let leftPoint = (this.point1.y < this.point2.y) ? this.point1:this.point2;
                let rightPoint = (this.point1.y >= this.point2.y) ? this.point1:this.point2;
                let leftPointRIGHT = this.board.getNearByPointByDirection(leftPoint, Direction.RIGHT);
                let rightPointLEFT = this.board.getNearByPointByDirection(rightPoint, Direction.LEFT);
                if (leftPointRIGHT.y != leftPoint.y && rightPointLEFT.y != rightPoint.y){
                    for (var i = rightPointLEFT.y; i <= leftPointRIGHT.y; i++) {
                        if (!this.board.hasMiddleValue(new Point(leftPoint.x, i), new Point(rightPoint.x, i))) {
                            this.path_Detail = &#91;leftPoint, new Point(leftPoint.x, i), new Point(rightPoint.x, i), rightPoint&#93;;
                            return true;
                        }
                    }
                }
            }
    
            //上下連消
            if (this.point1.x != this.point2.x){
                let upPoint = (this.point1.x < this.point2.x) ? this.point1:this.point2;
                let downPoint = (this.point1.x >= this.point2.x) ? this.point1:this.point2;
                let upPointDOWN = this.board.getNearByPointByDirection(upPoint, Direction.DOWN);
                let downPointUP = this.board.getNearByPointByDirection(downPoint, Direction.UP);
    
                if (upPointDOWN.x != upPoint.x && downPointUP.x != downPoint.x){
                    for (var i = downPointUP.x; i <= upPointDOWN.x; i++) {
                        if (!this.board.hasMiddleValue(new Point(i, upPoint.y), new Point(i, downPoint.y))) {
                            this.path_Detail = &#91;upPoint, new Point(i, upPoint.y), new Point(i, downPoint.y), downPoint&#93;;
                            return true;
                        }
                    }
                }
            }
    
            return false;
        }
    }&#91;/code&#93;
    
    新增<code>Board.ts</code>,內容如下:
    [code lang="js"]import {Path} from "./Path";
    import Point = PIXI.Point;
    import {Direction} from "./Direction";
    
    export class Board {
        public board: Array<array<number>>;
    
        constructor() {
            let content = [0, 1, 2, 3, 4, 5, 6, 7, 8, 9, 10, 11, 12, 13, 14, 15, 16, 17, 18, 19, 20, 21, 22, 23, 24];
            //產生初始局面
            let length = 10;
            let data = content.concat(content).concat(content).concat(content).sort((a, b) => (Math.random() > .5) ? 1 : 0);
            this.board = []
            for (var i = 0;i<length;i++){
                this.board.push(data.slice(i*length, (i+1)*length))
            }
        }
    
        public gameRoundEnd():boolean{
            for (var i =0;i<this.board.length;i++){
                for (var j = 0; j<this.board&#91;i&#93;.length;j++){
                    if(this.board&#91;i&#93;&#91;j&#93; != null){
                        return false;
                    }
                }
            }
            return true;
        }
    
        public getFirstExistPath():Path{
            var searchedValue = &#91;&#93;;
            for (var i =0;i<this.board.length;i++){
                for (var j = 0; j<this.board&#91;i&#93;.length;j++){
                    let value = this.board&#91;i&#93;&#91;j&#93;;
                    if(value!= null && searchedValue.indexOf(value) == -1){
                        searchedValue.push(value);
                        let positionsArr = this.getPositionByValue(value);
                        let permutationsArr = this.getPairNumPermutations(positionsArr.length);
                        for(var k = 0;k<permutationsArr.length;k++){
                            let v = permutationsArr&#91;k&#93;;
                            let path = new Path(positionsArr&#91;v&#91;0&#93;&#93;, positionsArr&#91;v&#91;1&#93;&#93;,this);
                            if(path.canLinkInLine()){
                                return path;
                            }
                        }
                    }
                }
            }
            return null;
        }
    
        private getAllValueInBoard(){
            let values = &#91;&#93;;
            for (var i =0;i<this.board.length;i++){
                for (var j = 0; j<this.board&#91;i&#93;.length;j++){
                    if(this.board&#91;i&#93;&#91;j&#93; != null){
                        values.push(this.board&#91;i&#93;&#91;j&#93;);
                    }
                }
            }
            return values;
        }
    
        public rearrangeBoard(){
            let values = this.getAllValueInBoard().sort((a, b) => (Math.random() > .5) ? 1 : 0);
            for (var i =0;i<this.board.length;i++){
                for (var j = 0; j<this.board&#91;i&#93;.length;j++){
                    if(this.board&#91;i&#93;&#91;j&#93; != null){
                        this.board&#91;i&#93;&#91;j&#93; = values.pop();
                    }
                }
            }
        }
    
        private pairNumPermutations = {};
        /**
         * 取得輸入的index中,2個2個一組的所有可能排列組合
         */
        public getPairNumPermutations(num:number){
            if(this.pairNumPermutations&#91;num&#93; != null){
                return this.pairNumPermutations&#91;num&#93;;
            }
            let data = &#91;&#93;;
            for(var i = 0; i <num;i++){
                for(var j = 0; j <num;j++){
                    if(i != j && i <= j){
                        data.push(&#91;i,j&#93;);
                    }
                }
            }
            this.pairNumPermutations&#91;num&#93; = data;
            return data;
        }
    
        public getPositionByValue(value:number):Array<point>{
            let arr = new Array<point>();
            for (var i =0;i<this.board.length;i++){
                for (var j = 0; j<this.board&#91;i&#93;.length;j++){
                    if (this.board&#91;i&#93;&#91;j&#93; == value){
                        arr.push(new Point(i, j));
                    }
                }
            }
            return arr;
        }
    
        public getNearByPointByDirection(point: Point, direction: string): Point {
            let nearByPoint: Point = new Point(point.x, point.y);
            switch (direction) {
                case Direction.UP:
                    for (var i = point.x-1; i >= 0; i--) {
                        if (this.board[i][point.y] == null) {
                            nearByPoint.x = i;
                        } else {
                            break;
                        }
                    }
                    if (nearByPoint.x == 0) {
                        nearByPoint.x = -1;
                    }
                    break;
                case Direction.DOWN:
                    let maxLengthDOWN = this.board.length;
                    for (var i = point.x+1; i < maxLengthDOWN; i++) {
                        if (this.board&#91;i&#93;&#91;point.y&#93; == null) {
                            nearByPoint.x = i;
                        } else {
                            break;
                        }
                    }
                    if (nearByPoint.x == maxLengthDOWN - 1) {
                        nearByPoint.x = maxLengthDOWN;
                    }
                    break;
                case Direction.RIGHT:
                    let maxLengthRIGHT = this.board&#91;0&#93;.length;
                    for (var i = point.y+1; i < maxLengthRIGHT; i++) {
                        if (this.board&#91;point.x&#93;&#91;i&#93; == null) {
                            nearByPoint.y = i;
                        } else {
                            break;
                        }
                    }
                    if (nearByPoint.y == maxLengthRIGHT - 1) {
                        nearByPoint.y = maxLengthRIGHT;
                    }
                    break;
                case Direction.LEFT:
                    for (var i = point.y-1; i >= 0; i--) {
                        if (this.board[point.x][i] == null) {
                            nearByPoint.y = i;
                        } else {
                            break;
                        }
                    }
                    if (nearByPoint.y == 0) {
                        nearByPoint.y = -1;
                    }
                    break;
            }
            return nearByPoint;
        }
    
        public canFindPath(a: Point, b: Point, direction:string): boolean {
            return this.hasMiddleValue(a ,b);
        }
        public hasMiddleValue(a: Point, b: Point): boolean {
            let arr = [];
            if (a.x == b.x) {
                if (a.x == -1 || a.x == this.board.length) return false;
                let max = Math.max(a.y, b.y);
                let min = Math.min(a.y, b.y);
                for (var i = min + 1; i < max; i++) {
                    if (this.board&#91;a.x&#93;&#91;i&#93; != null) {
                        return true;
                    }
                }
                return false;
            } else if (a.y == b.y) {
                if (a.y == -1 || a.y == this.board&#91;0&#93;.length) return false;
                let max = Math.max(a.x, b.x);
                let min = Math.min(a.x, b.x);
                for (var i = min + 1; i < max; i++) {
                    if (this.board&#91;i&#93;&#91;a.y&#93; != null) {
                        return true;
                    }
                }
                return false;
            } else {
                return true;
            }
        }
    
        public hasSameValue(point1: Point, point2: Point): boolean {
            return this.board&#91;point1.x&#93;&#91;point1.y&#93; == this.board&#91;point2.x&#93;&#91;point2.y&#93;;
        }
    
        public clearPoint(point: Point) {
            this.board&#91;point.x&#93;&#91;point.y&#93; = null;
            point = null;
        }
    }&#91;/code&#93;
    
    新增<code>Direction.ts</code>,內容如下:
    [code lang="js"]export class Direction {
        public static UP: string = "up";
        public static DOWN: string = "down";
        public static RIGHT: string = "right";
        public static LEFT: string = "left";
    }

    需要另外撰寫的部份

    第一部份邏輯的介面我們是使用angularJS來做呈現,而現在的專案則需要使用pixiJS,因此呈現部份的程式碼需要重新撰寫。

    首先我們先創立一個檔案名為GameBoard.ts,要放置所有的圖示。

    import Container = PIXI.Container;
    
    export class GameBoard extends Container{
    }

    然後在GameScene.ts加入這個元件:

    //加入連連看牌面
    application.stage.addChild(new GameBoard());


    實際撰寫GameBoard的邏輯

    完整的程式碼內容如下:

    import Container = PIXI.Container;
    import {Board} from "../core/Board";
    import {Loader} from "../core/Loader";
    import Point = PIXI.Point;
    import {Path} from "../core/Path";
    import {SoundMgr} from "../core/SoundMgr";
    
    
    export let board:Board;
    
    export class GameBoard extends Container{
    
        private select1 = new Point(-1, -1);
        private select2 = new Point(-1, -1);
        private selected = false;
        private msgArr = [];
        private reloadTimes = 3;
        private selectedBorder:PIXI.Graphics;
    
        constructor() {
            super();
            this.createNewGame();
            this.x = 175;
            this.y = 20;
        }
    
        createNewGame = ()=>{
            this.removeChildren();
            this.select1 = new Point(-1, -1);
            this.select2 = new Point(-1, -1);
            this.selected = false;
            this.msgArr = [];
            this.reloadTimes = 3;
            board = new Board();
            for (var i =0;i<board.board.length;i++){
                for (var j = 0; j<board.board&#91;i&#93;.length;j++){
                    this.createIcon(board.board&#91;i&#93;&#91;j&#93;, i, j);
                }
            }
        };
    
        clearIcon = (point:Point)=>{
            this.removeChild(this.getChildByName('icon_'+point.x+"_"+point.y));
            board.clearPoint(point);
            this.removeChild(this.selectedBorder);
        };
    
        IconSelected = (point:Point)=>{
        };
    
        IconUnSelected = (point:Point)=>{
        };
    
        createIcon = (id, x, y)=>{
            let icon = PIXI.Sprite.from(Loader.resources['Icon'].textures['icon_' + id]);
            icon.name = 'icon_'+x+"_"+y;
            icon.width = icon.height = 45;
            icon.x = (icon.width + 20) * x + 22.5;
            icon.y = (icon.width + 6) * y + 22.5;
            icon.anchor.set(0.5);
            icon.buttonMode = true;
            icon.interactive = true;
            this.addChild(icon);
            let iconClickHandler = ()=>{
                if (this.selected) {
                    let selectCorrect = false;
                    this.select2 = new Point(x, y);
                    if (board.hasSameValue(this.select1, this.select2)) {
                        if (! (this.select1.x == x && this.select1.y == y) ) {
                            let path = new Path(this.select1, this.select2, board);
                            if(path.canLinkInLine()){
                                this.msgArr.push(path);
                                selectCorrect = true;
                                //判斷還有沒有路走
                                if(board.gameRoundEnd()){
                                    alert("恭喜完成遊戲!");
                                    this.createNewGame();
                                }else if(board.getFirstExistPath() == null){
                                    this.reloadTimes--;
                                    board.rearrangeBoard();
                                }
                            }
                        }
                    }
                    if(selectCorrect){
                        this.clearIcon(this.select1);
                        this.clearIcon(this.select2);
                        SoundMgr.play('Sound_select_crrect');
                    }else{
                        SoundMgr.play('Sound_select_error');
                        this.IconUnSelected(this.select1);
                    }
                    this.selected = false;
                } else {
                    this.select1 = new Point(x, y);
                    this.IconSelected(this.select1);
                    this.selected = true;
                    SoundMgr.play('Sound_select_1');
    
                }
            };
            icon.on("click", iconClickHandler);
            icon.on("tap", iconClickHandler);
        }
    }

    今日成果

    今天終於有個連連看遊戲的樣子了!

    程式碼下載:ironman20181103
    線上demo:http://claire-chang.com/ironman2018/1103/
    Posted on Leave a comment

    [18- Pixi教學] 按鈕製作

    開啟按鈕效果

    官網點擊效果範例:https://pixijs.io/examples/#/basics/click.js
    預設sprite是無法被點擊到的,因為要偵測這些事件會讓sprite更耗資源,因此如果我們想要讓一個sprite可以被點擊,則要特別對元件設定:

    // Opt-in to interactivity
    sprite.interactive = true;
    // Shows hand cursor
    sprite.buttonMode = true;
    // Pointers normalize touch and mouse
    sprite.on('pointerdown', onClick);
    sprite.on('click', onClick); // mouse-only
    sprite.on('tap', onClick); // touch-only

    在連連看專案加入按鈕

    ButtonBase

    因為連連看裡面有許多個按鈕,每個按鈕雖然功能不同,但是會有許多相似的設定,因此將按鈕抽出一個ButtonBase的父類別
    ButtonBase.ts的內容如下:

    import Sprite = PIXI.Sprite;
    import {Loader} from "../core/Loader";
    
    export class ButtonBase extends Sprite{
    
        constructor(_id:string, textureID:string, _x:number, _y:number) {
            super();
            this.texture = Loader.resources[_id].textures[textureID];
            this.interactive = true;
            this.buttonMode = true;
            this.x = _x;
            this.y = _y;
            this.anchor.set(0.5);
    
            //按下效果
            this.on("mousedown", this.mouseDownEffect.bind(this));
            this.on("mouseup", this.mouseUpEffect.bind(this));
            this.on("mouseout", this.mouseOutEffect.bind(this));
            this.on("touchstart", this.mouseDownEffect.bind(this));
            this.on("touchend", this.mouseUpEffect.bind(this));
    
            this.on("mouseup", this.trigger.bind(this));
            this.on("touchend", this.trigger.bind(this));
        }
        public trigger(){
        }
        public mouseDownEffect():void{
        }
        public mouseUpEffect():void{
        }
        public mouseOutEffect():void{
        }
    }

    SoundBtn

    新增一個檔案SoundBtn.ts,製作聲音開/關按鈕,內容如下:

    import {ButtonBase} from "./ButtonBase";
    import {Loader} from "../core/Loader";
    import {SoundMgr} from "../core/SoundMgr";
    
    
    export class SoundBtn extends ButtonBase {
        private isMute: boolean = false;
        constructor() {
            super('Button','Sound_On',50,170);
            this.updateImage();
    
        }
        public trigger(){
            this.isMute = !this.isMute;
            SoundMgr.mute(this.isMute);
            this.updateImage();
        }
        updateImage = ()=>{
            if (this.isMute){
                this.texture = this.texture = Loader.resources['Button'].textures['Sound_Off'];
            } else{
                this.texture = this.texture = Loader.resources['Button'].textures['Sound_On'];
            }
        }
    
    }

    GameScene

    因為除了聲音按鈕外,要設定整個場景還需要加入非常多東西,因此我新增了一個類別叫GameScene,主要在將所有場景上的物件加進場景裡
    GameScene.ts其內容如下

    import {Loader} from "../core/Loader";
    import {application} from "../Main";
    import {SoundBtn} from "./SoundBtn";
    
    export class GameScene {
    
        public static draw(){
            //加入背景
            application.stage.addChild(PIXI.Sprite.from(Loader.resources["background"].texture));
            //加入按鈕
            application.stage.addChild(new SoundBtn());
        }
    }


    實作靜音功能

    在SoundMgr.ts加上靜音功能

        static isMute: boolean = false;
        public static mute(value:boolean):void {
            this.isMute = value;
            if (this.isMute) {
                //禁聲
                Howler.mute(true);
            } else {
                //出聲
                Howler.mute(false);
            }
        }

    今日成果


    線上demo:http://claire-chang.com/ironman2018/1102/
    檔案下載:ironman20181102

    Posted on Leave a comment

    [17- Pixi教學] 音樂音效設定


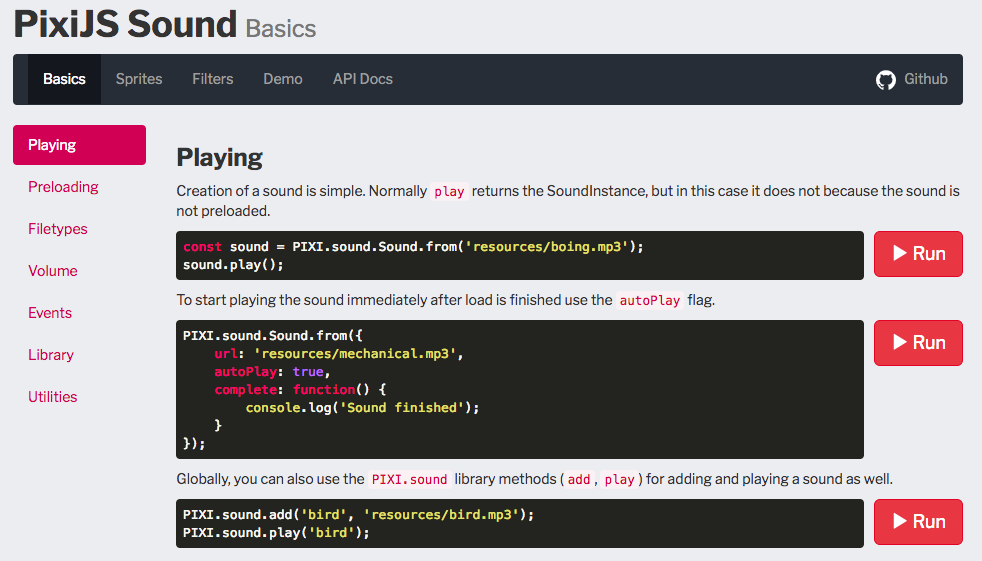
    PixiJS Sound

    PixiJS本身有開發可供使用的PIXI.sound

    並且官網上有很詳細的使用範例以及API手冊:PixiJS Sound

    PixiJS Sound最大的優點是它可以與pixi的素材共用同一個Loader,下載mp3的資源檔案。並支援相當多種的音樂格式,也可以將多個音效壓縮在一個mp3內,再根據要開始與結束的秒數去切成多個聲音資源。在一般的狀況下,PixiJS Sound應為搭配PixiJS首選可使用的音樂函式庫

    PixiJS Sound於TypeScript

    不過很可惜的,PixiJS Sound現在在typescript上的支援度尚不是那麼的好。PixiJS Sound並沒有推出針對type script專案的函式庫,在開發上會帶給使用typescript的人帶來一些困擾。因此我選擇了另一款很受歡迎的聲音函式庫howler

    下面是howler.js一些簡單的使用範例

    var sound = new Howl({
      src: ['sound.webm', 'sound.mp3']
    });
    
    // Clear listener after first call.
    sound.once('load', function(){
      sound.play();
    });
    
    // Fires when the sound finishes playing.
    sound.on('end', function(){
      console.log('Finished!');
    });
    var sound = new Howl({
      src: ['sound.webm', 'sound.mp3', 'sound.wav'],
      autoplay: true,
      loop: true,
      volume: 0.5,
      onend: function() {
        console.log('Finished!');
      }
    });


    在連連看專案內使用Howler

    ResourcesList.ts裡新增要下載的mp3檔案

    public static sound:Array<resources> = [
            new Resources('Sound_bg','assets/bg.mp3'),
            new Resources('Sound_level_pass','assets/level_pass.mp3'),
            new Resources('Sound_select_1','assets/select_1.mp3'),
            new Resources('Sound_select_crrect','assets/select_crrect.mp3'),
            new Resources('Sound_select_error','assets/select_error.mp3')
        ];

    新增SoundMgr.ts內容如下:

    import {ResourcesList} from "./ResourcesList";
    
    export class SoundMgr {
        private static soundList:Array<soundInfo> = new Array<soundInfo>();
        public static load(){
            ResourcesList.sound.forEach(element => {
                let info = new SoundInfo(element.id, element.path);
                this.soundList.push(info);
            });
        }
        public static play(id, loop = false){
            this.soundList.forEach(element => {
                if (element.soundID == id){
                    element.sound.loop(loop);
                    element.sound.play();
                }
            });
        }
    }
    class SoundInfo{
        public soundID:string;
        public path:string;
        public sound:Howl;
        constructor(_id:string, url:string) {
            this.soundID = _id;
            this.path = url;
            this.load();
        }
        public load(){
            this.sound = new Howl({src: this.path});
        }
    }

    Main.ts加入

                //播放背景音樂
                SoundMgr.play('Sound_bg',true);

    並呼叫load()來下載音檔

    SoundMgr.load();

    需要注意的是,因為howler的loader與pixi本身的是兩個不同的loader,所以像這樣的寫法,很有可能剛進遊戲音效會還沒有載入完成,等到載完後才會播放聲音。如果希望一定要剛進遊戲就有聲音,那就需要把拿掉loading page的判斷另外加上音效是否載入完成的判斷。

    今日成果

    專案下載:ironman20181101
    線上demo:http://claire-chang.com/ironman2018/1101/

    Posted on Leave a comment

    [16- Pixi教學] 與網頁互動-控制loading page


    加入loading page

    上一篇的成果在載入檔案時畫面就會停在那邊,一般的遊戲通常會有一個下載中的畫面,告知使用者現在下載了幾%,還差幾%還未下載完成。
    因此今日我們就要來製作這個loading page

    首先,在index.html裡加上一個div

    <div id="gameContainer">
      <canvas id="gameCanvas"></canvas>
      <div id="loadingPage">Loading...</div>
    </div>

    並在style.css裡設定

    #gameCanvas{
        position:absolute;
    }
    #loadingPage{
        min-width: 100%;
        min-height: 100%;
        position:absolute;
        left:0px;
        top: 0px;
        z-index:1;
        background-color: #000000;
        color: #fff;
        text-align: center;
        vertical-align: middle;
        line-height: 100vh;
    }
    #loadingPercent{
        position:absolute;
        min-width: 100%;
        min-height: 100%;
        top:calc(50%);
    }

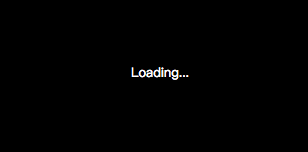
    這樣我們就會有一個很簡單的loading畫面如下圖

    更新loading進度

    直接用jquery去操控剛剛所設定的div裡面的文字顯示,來更新現在的下載進度:

    this.loader.onProgress.add((e) => {
        jQuery("#loadingPage").html("Loading..." + Math.floor(e.progress) + "%");
    });

    整個Loader.ts修改後的程式碼如下:

    import { ResourcesList } from "./ResourcesList";
    import {eventEmitter} from "../Main";
    import {CoreEvent} from "./Event";
    import math = PIXI.core.math;
    
    export class Loader{
        private static loader:PIXI.loaders.Loader;
        private static failedFiles:Array<string> = [];
        private static completedFiles:Array<string> = [];
        public static resources:PIXI.loaders.Resource;
    
        public static load(){
            this.loader = new PIXI.loaders.Loader();
            ResourcesList.img.forEach(element => {
                this.loader.add(element.id, element.path);
            });
            this.loader.load((loader, resources) => {
                this.resources = resources;
            });
            //可取得下載進度
            this.loader.onProgress.add((e) => {
                jQuery("#loadingPage").html("Loading..." + Math.floor(e.progress) + "%");
            });
            //載入檔案錯誤時
            this.loader.onError.add((t, e, r) => {
                this.failedFiles.push(r.name);//載入失敗的檔案列表
            });
            //每個檔案載入時都會呼叫
            this.loader.onLoad.add((e, t) => {
                this.completedFiles.push(t.name);//載入成功的檔案列表
            });
            //全部下載完成後
            this.loader.onComplete.add(() => {
                if (this.failedFiles.length == 0){
                    //全部的檔案都下載成功
                } else{
                    jQuery("#loadingPage").html("Loading...failed: could not load "+ this.failedFiles);
                }
            });
        }
    }

    EventEmitter介紹

    PIXI.utils.EventEmitter使用EventEmitter3,在pixiJSv4之後已直接被整理到pixi裡了。
    這個套件可以讓我們在js裡很方便的使用事件,在動畫處理上,事件的監聽與發送可以讓我們在處理動畫上更加輕鬆,也可以降低這些元件間的相依性。

    下面是EventEmitter3上的一個簡單使用範例

    var EE = new EventEmitter()
      , context = { foo: 'bar' };
    
    function emitted() {
      console.log(this === context); // true
    }
    
    EE.once('event-name', emitted, context);//context為傳入函數的參數
    EE.on('another-event', emitted, context);
    EE.removeListener('another-event', emitted, context);

    如果我們希望整個遊戲共用一個EventEmitter,可以將產生的EventEmitter做export:

    export let eventEmitter:EventEmitter;

    要使用這個物件可以直接import進來

    import {eventEmitter} from "../Main";

    發送下載完成事件

    Loader.ts加入下面的程式碼:

     //全部下載完成後
            this.loader.onComplete.add(() => {
                if (this.failedFiles.length == 0){
                    eventEmitter.emit(CoreEvent.AssetsLoadComplete);
                } else{
                    jQuery("#loadingPage").html("Loading...failed: could not load "+ this.failedFiles);
                }
            });

    接著在Main.ts裡設定下載完後要做的事情:

    //設定共用的事件傳遞元件
            eventEmitter = new EventEmitter();
            eventEmitter.on(CoreEvent.AssetsLoadComplete,()=>{
                //隱藏loading page
                jQuery("#loadingPage").hide();
                //加入背景
                var background = PIXI.Sprite.from(Loader.resources["background"].texture);
                application.stage.addChild(background);
            });

    上面需要注意,因為我們在Loader.loader.load()裡將下載後的resource存在一個變數裡,所以我們可以直接使用

    Loader.resources["background"].texture

    來取得某一個resource id下的texture。

    今日成果

    線上展示:http://claire-chang.com/ironman2018/1031/
    成果檔案下載:ironman20181031

    Posted on Leave a comment

    [15- Pixi教學] 載入素材

    用PIXI.Sprite來載入圖檔

    在PIXI.Sprite裡有一個fromImage(‘URL’)的方法可以直接讓我們將某個圖檔載入Sprite裡面,如:

    var bunny = PIXI.Sprite.fromImage('required/assets/basics/bunny.png')

    但這只能針對單張圖檔,而不能處理SpriteSheet的狀況。

    並且當我們在做一個遊戲專案時,通常會需要先載完所有的遊戲素材,這樣才不會在進遊戲時看到未載完圖檔的空白而產生錯誤或破圖。
    因此較多的時候,我們都會使用PIXI.loaders去下載並監聽下載進度,製作一個loading bar。
    並在素材載入完成後才進入遊戲。
    

    PIXI.loaders

    下面為一個PIXI.loaders的簡單使用範例

    const loader = new PIXI.loaders.Loader();
    loader.add('bunny', 'data/bunny.png')
          .add('spaceship', 'assets/spritesheet.json');
    loader.load((loader, resources) => {
       // resources.bunny
       // resources.spaceship
    });

    PIXI.loaders是從resource-loader擴展的。
    下面為resource-loader的GitHub上的一個簡單使用範例:

    // ctor
    const loader = new Loader();
    
    loader
        // Chainable `add` to enqueue a resource
        .add(name, url, options)
    
        // Chainable `pre` to add a middleware that runs for each resource, *before* loading that resource.
        // This is useful to implement custom caching modules (using filesystem, indexeddb, memory, etc).
        .pre(cachingMiddleware)
    
        // Chainable `use` to add a middleware that runs for each resource, *after* loading that resource.
        // This is useful to implement custom parsing modules (like spritesheet parsers, spine parser, etc).
        .use(parsingMiddleware)
    
        // The `load` method loads the queue of resources, and calls the passed in callback called once all
        // resources have loaded.
        .load((loader, resources) => {
            // resources is an object where the key is the name of the resource loaded and the value is the resource object.
            // They have a couple default properties:
            // - `url`: The URL that the resource was loaded from
            // - `error`: The error that happened when trying to load (if any)
            // - `data`: The raw data that was loaded
            // also may contain other properties based on the middleware that runs.
        });
    
    // throughout the process multiple signals can be dispatched.
    loader.onProgress.add((event) => {}); // called once per loaded/errored file
    loader.onError.add((target,event,error) => {}); // called once per errored file
    loader.onLoad.add((target) => {}); // called once per loaded file
    loader.onComplete.add(() => {}); // called once when the queued resources all load.

    從範例可以看出,我們可以用onProgressonErroronLoadonComplete
    來取得現在的下載進度,並且根據所傳入的參數來更新loading page要顯示的資訊。


    開始載入連連看圖檔

    新增一個檔案名為ResourcesList.ts,用來設定要載入的圖片並設定一個識別id給它。
    其內容如下:

    class Resources{
        public id:string;
        public path:string;
    
        constructor(id, path) {
            this.id = id;
            this.path = path;
        }
    }
    export class ResourcesList{
        public static img = [
            new Resources('bunny','assets/bunny.png'),
            new Resources('background','assets/background.png'),
            new Resources('Button','assets/Button.json'),
            new Resources('Character_Idle','assets/Character_Idle.json'),
            new Resources('Character_Jump','assets/Character_Jump.json'),
            new Resources('Character_Laugh','assets/Character_Laugh.json'),
            new Resources('Icon','assets/Icon.json')
        ];
    }

    接著新增Loader.ts檔案,用來載入並監控下載進度。

    import { ResourcesList } from "./ResourcesList";
    import {CoreEvent} from "./Event";
    import math = PIXI.core.math;
    
    export class Loader{
        private static loader:PIXI.loaders.Loader;
        private static failedFiles:Array<string> = [];
        private static completedFiles:Array<string> = [];
        public static resources:PIXI.loaders.Resource;
    
        public static load(){
            this.loader = new PIXI.loaders.Loader();
            ResourcesList.img.forEach(element => {
                this.loader.add(element.id, element.path);
            });
            this.loader.load((loader, resources) => {
                this.resources = resources;
            });
            //可取得下載進度
            this.loader.onProgress.add((event) => {
                console.log("onProgress: ",event);
            });
            //載入檔案錯誤時
            this.loader.onError.add((target, event, error) => {
                this.failedFiles.push(error.name);
                console.log("onError: ",error);
            });
            //每個檔案載入時都會呼叫
            this.loader.onLoad.add((event, target) => {
                this.completedFiles.push(target.name);
                console.log("onLoad: ",target);
            });
            //全部下載完成後
            this.loader.onComplete.add(() => {
                if (this.failedFiles.length == 0){
                    console.log("all file completed");
                } else{
                    console.log("Loading...failed: could not load "+ this.failedFiles);
                }
            });
        }
    }

    並在Main.ts裡加上

            //載入素材
            Loader.load();


    觀察事件觸發時機

    從console視窗可以看到我們在Loader內所下的log被觸發的時機

    從上圖可知:

    • onProgress:每一段時間都會更新現在下載的進度
    • onError:有載入失敗的圖檔會呼叫這個func,然後繼續執行後面的圖檔的載入動作
    • onLoad:每一個檔案下載完成都會呼叫這個function,載入一個spritesheet的json檔案,會呼叫兩次onLoad,一次是json載入,一次是載入這個json裡所指定要使用到的png檔案
    • onComplete:全部載入完成後會呼叫,要注意即使中間有檔案載入失敗也會呼叫此function


    今日成果

    線上展示:http://claire-chang.com/ironman2018/1030/
    今日檔案下載:ironman20181030